To create a FO you need to be an owner or member of an organization and have the project to be funded linked to it.
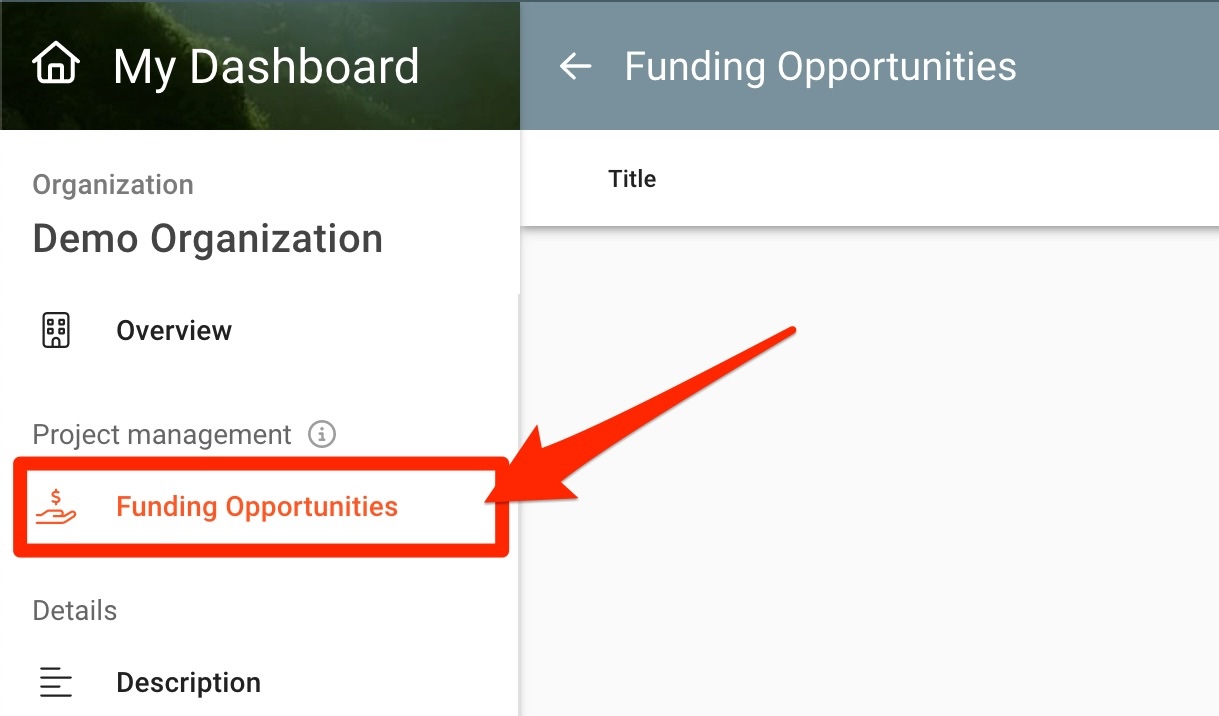
Select FO in the content menu on the left of your organization overview.
On the top right of the FO list, click on the plus icon.
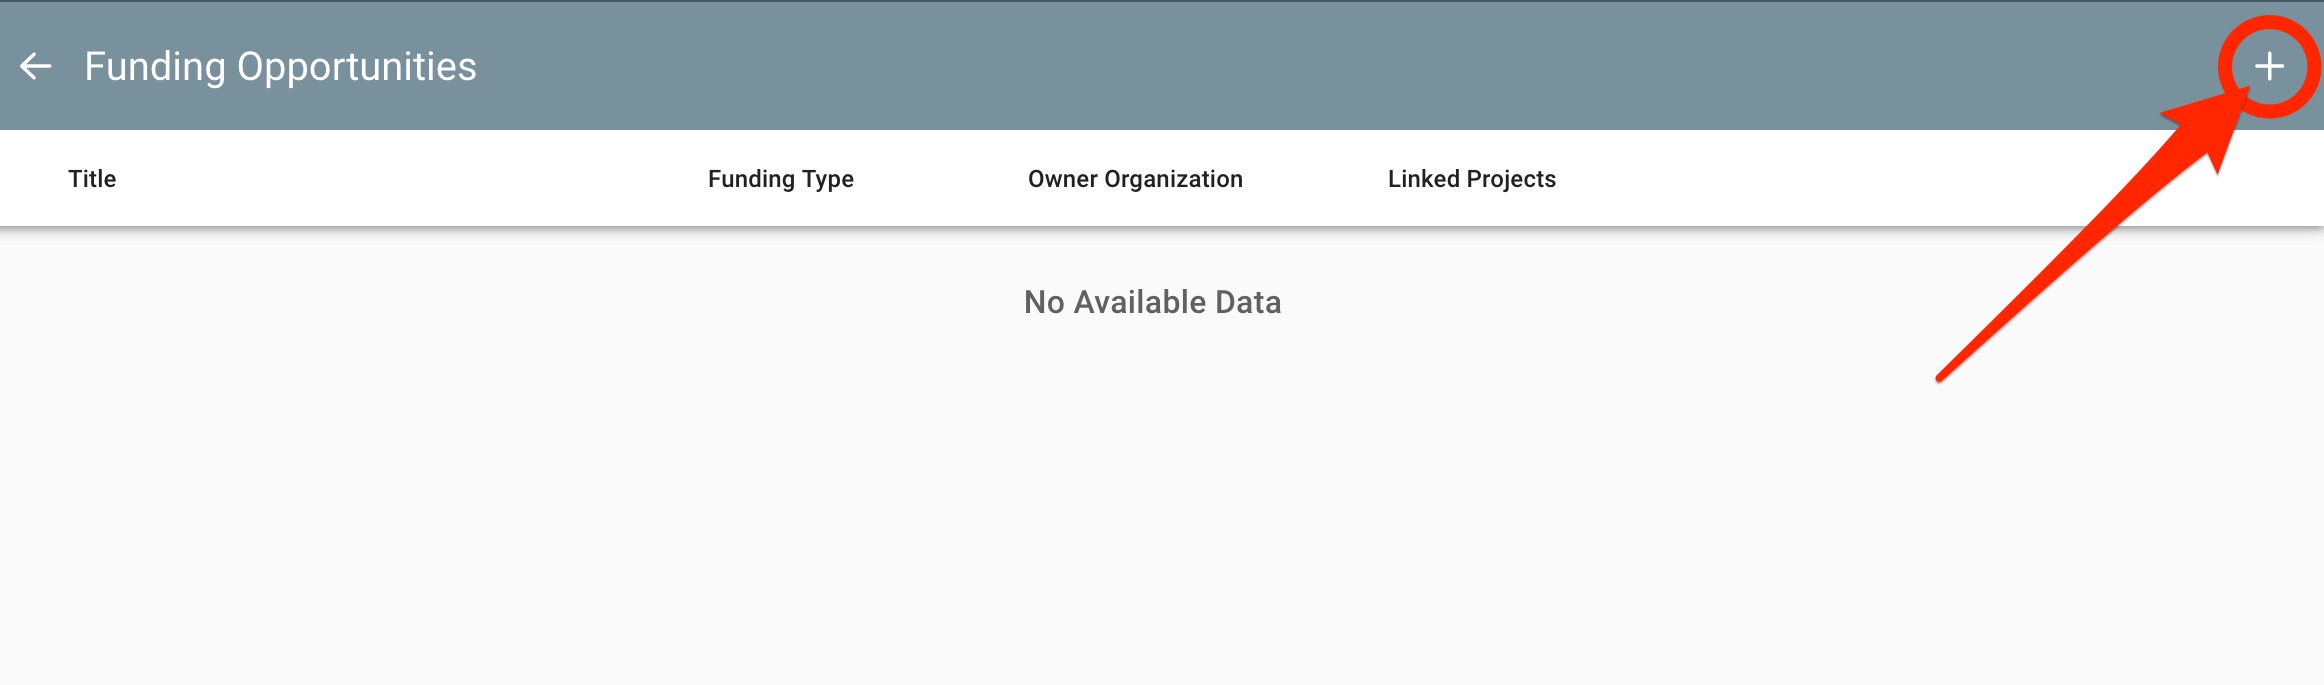
The FO creation window will open.

Start by naming the new FO and select the type of funding from the dropdown menu. Click SUBMIT when done.
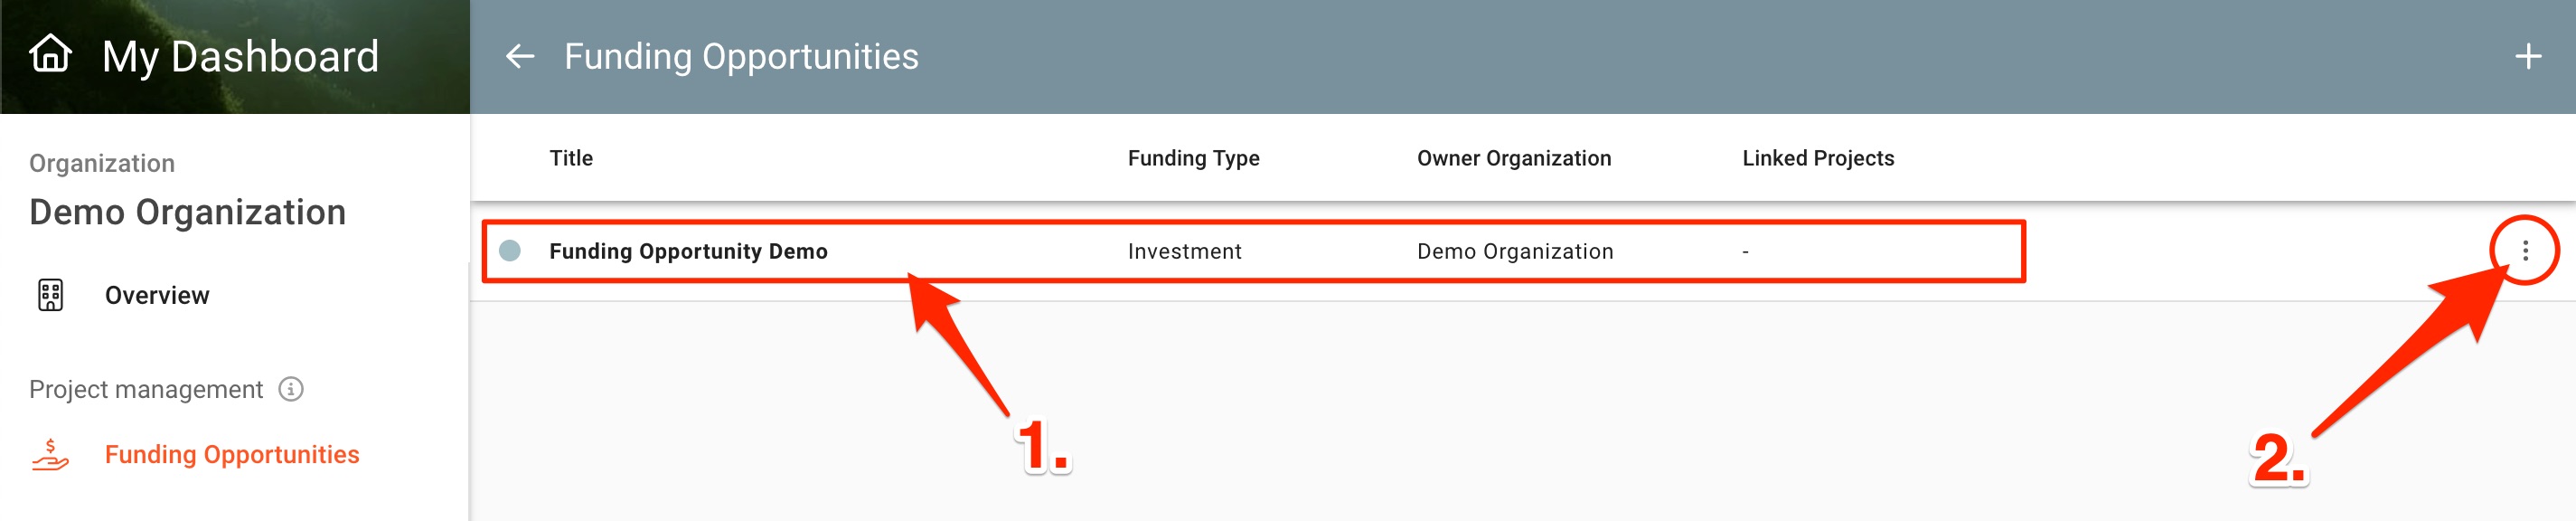
Your newly created FO will appear in the FO list. Click anywhere on the FO to open the details ① or on the three dots on the right side to open the details or delete the FO ②.
Funding Opportunities details
In the FO details section you can fill out all information regarding the funding needs of your project.
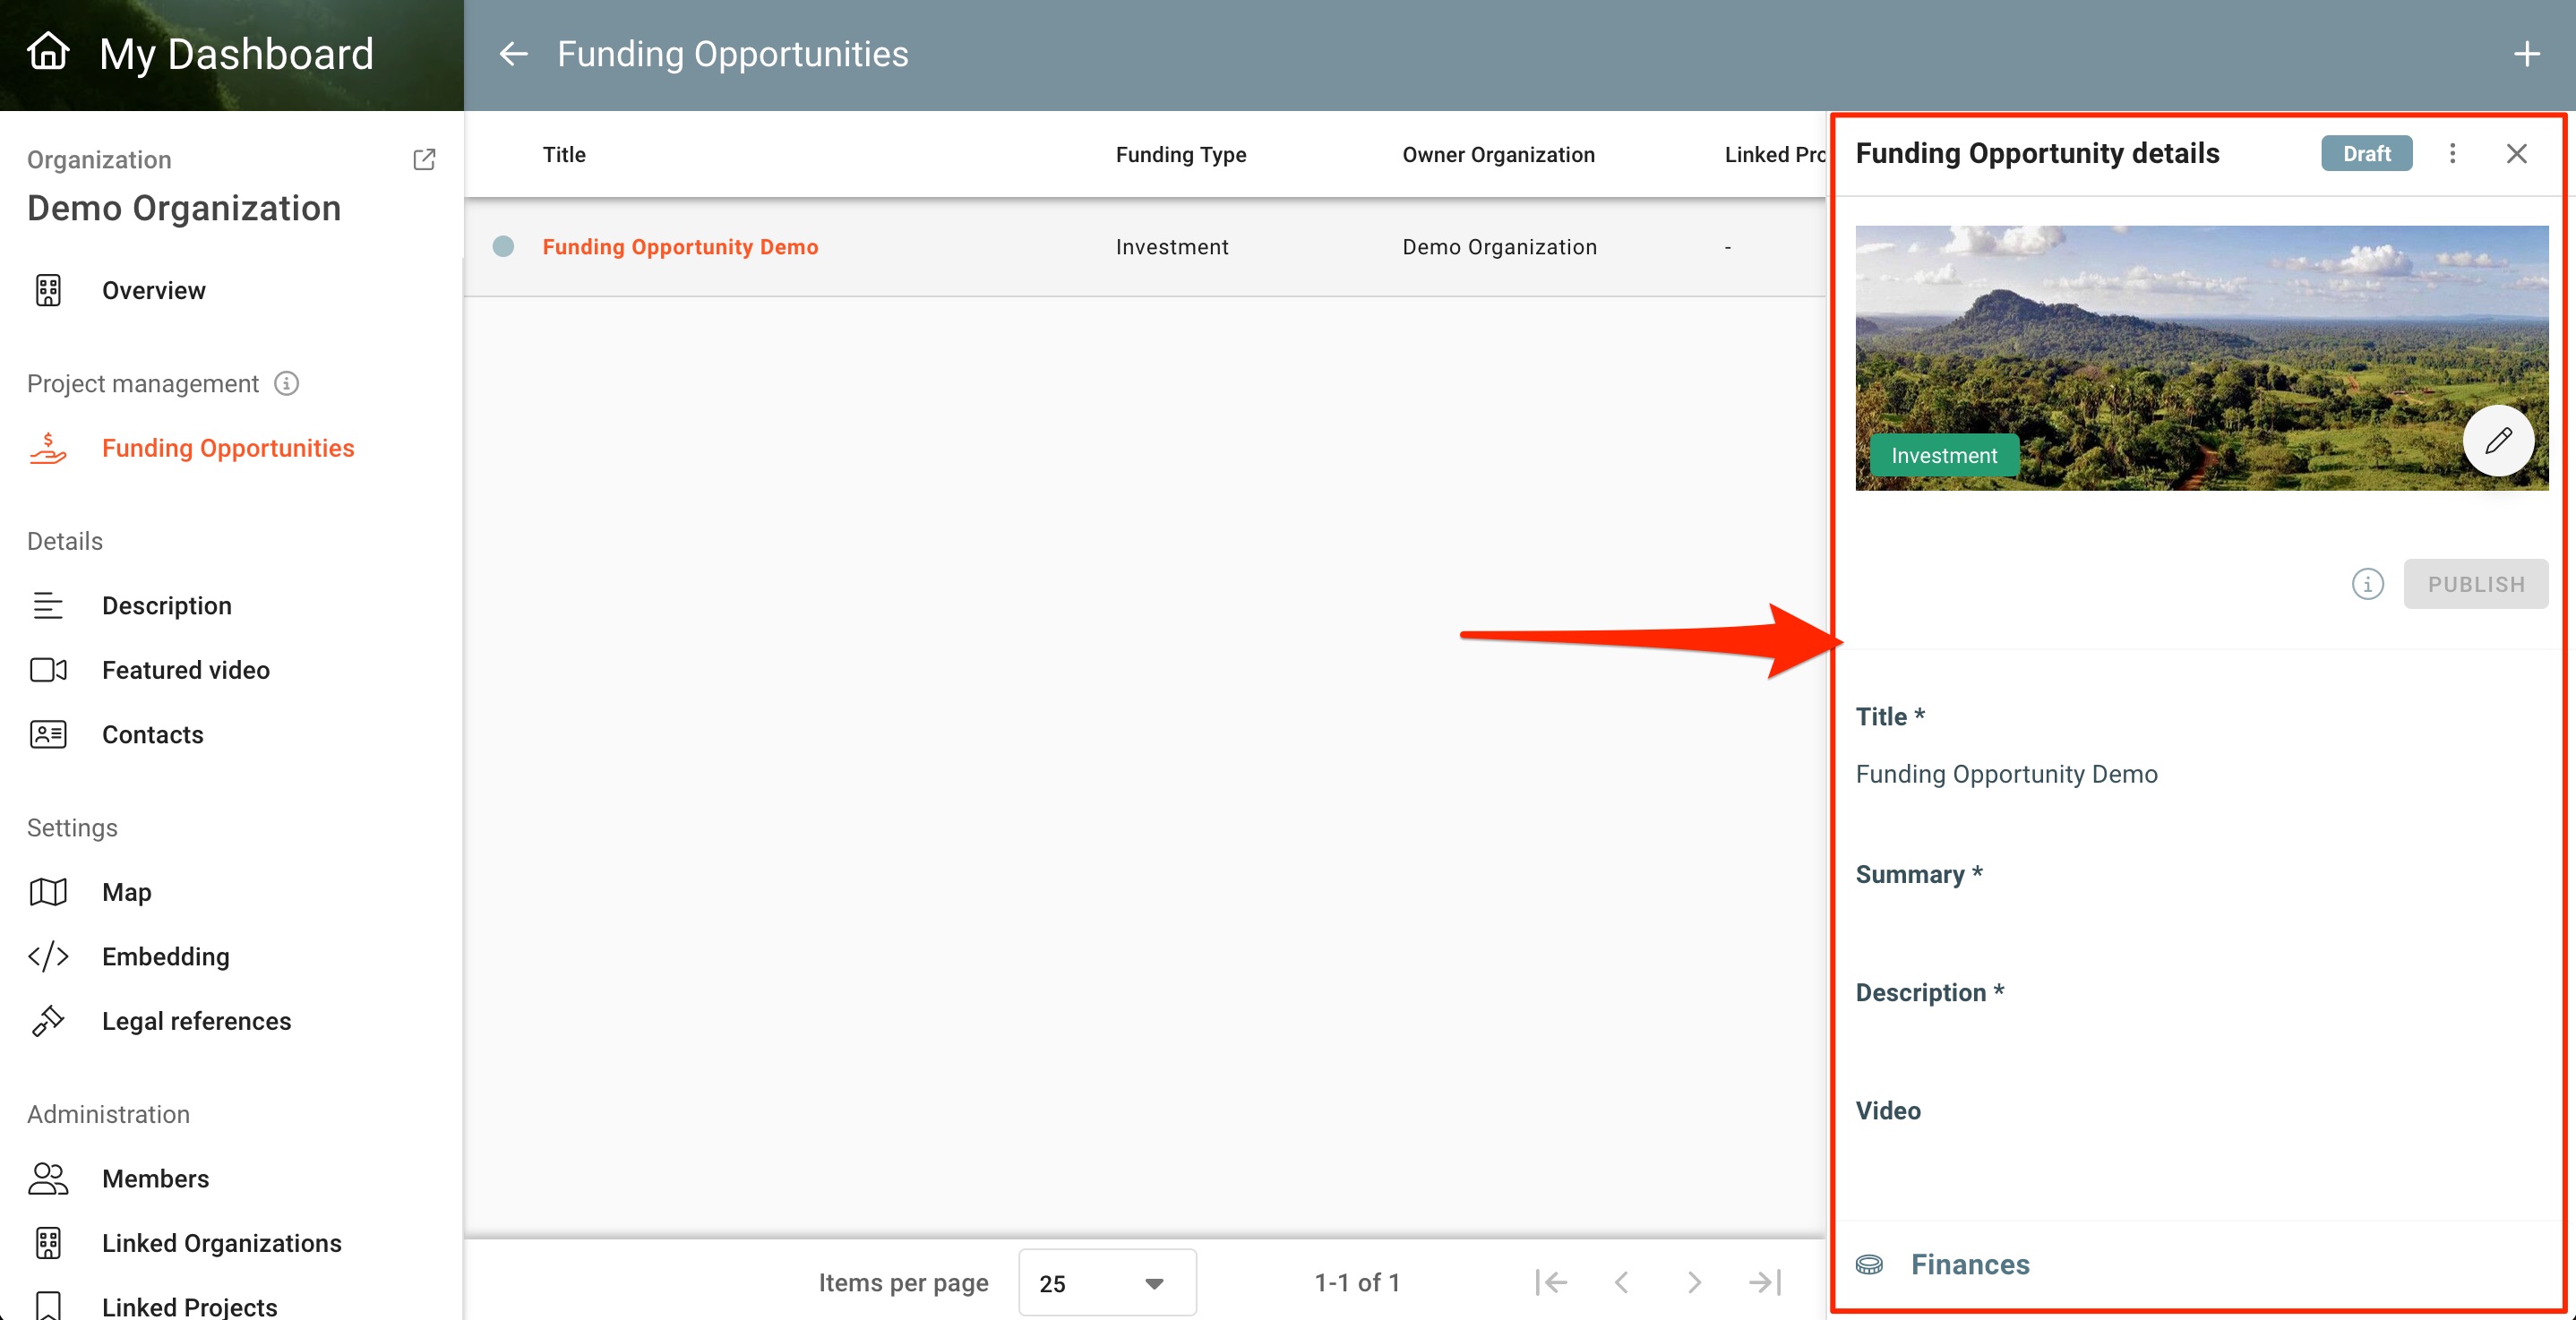
- Status of your FO - Turns green and to "public" as soon as you publish your FO.
- More options - Opens more options menu: 1. Delete FO and once it's published also 2. Unpublish FO and 3. Open FO preview page.
- Close Funding Opportunities details section.
- Upload header image for FO
- Publish checklist information.
- Publish button - once all mandatory fields are completed it turns orange and can be activated.

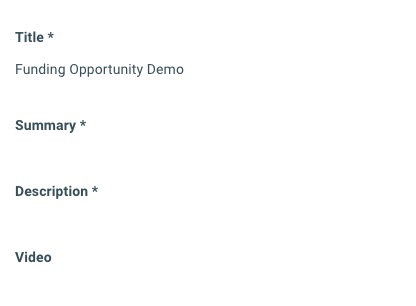
Basic information
Fill out title, summary and description of the FO.
Under Video you can add a video to your FO by pasting a youtube or vimeo link.
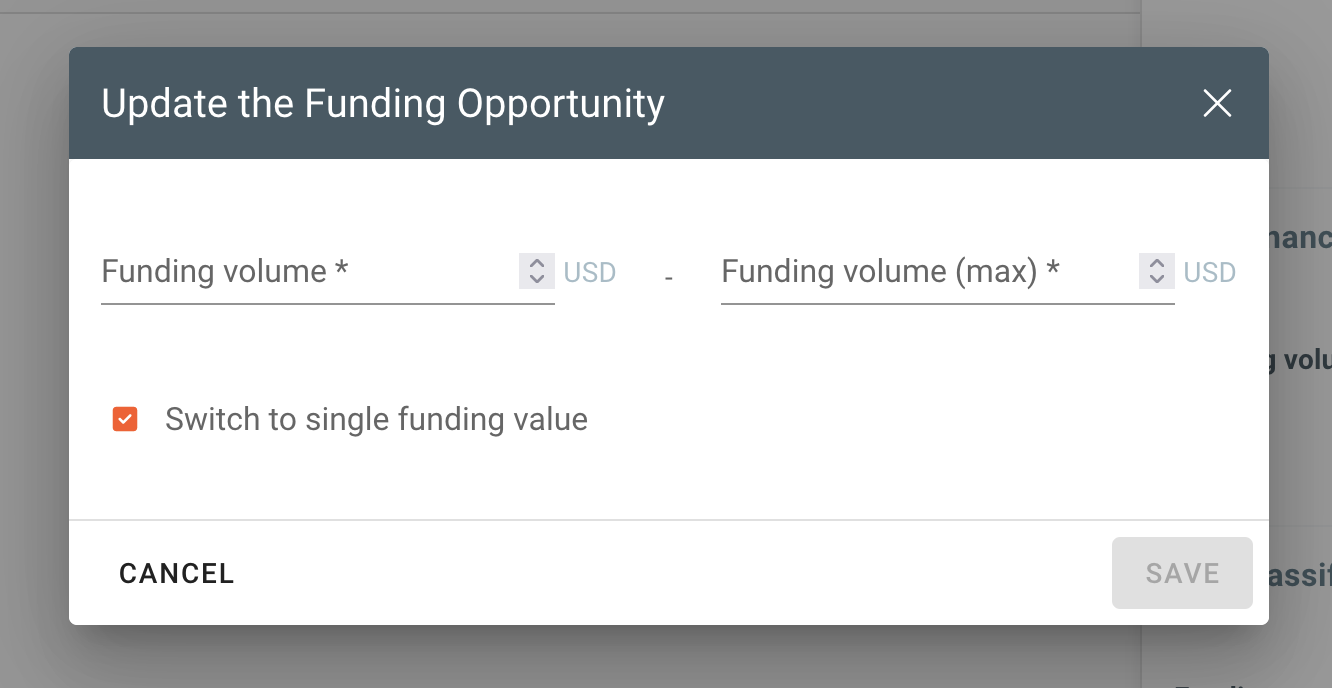
Finances
Funding volume: Here you should input the amount of funding needed. If you are not sure on a definite volume you can activate the funding interval by checking the check box. (Units are in USD)
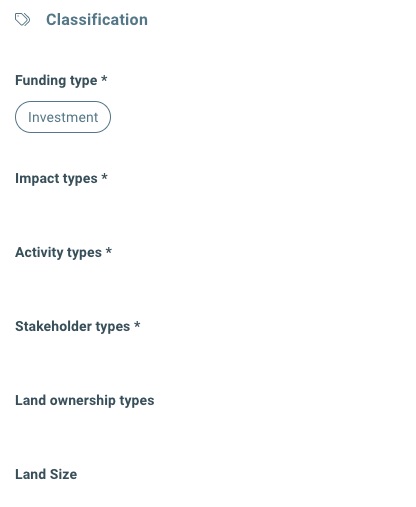
Classification
Select desired Funding, Impact, Activity, Stakeholder, and Land ownership types from the corresponding dropdown menus. (Except for Funding type, all fields allow for multiple choice.)
In Land Size input the size of the land in hectares.
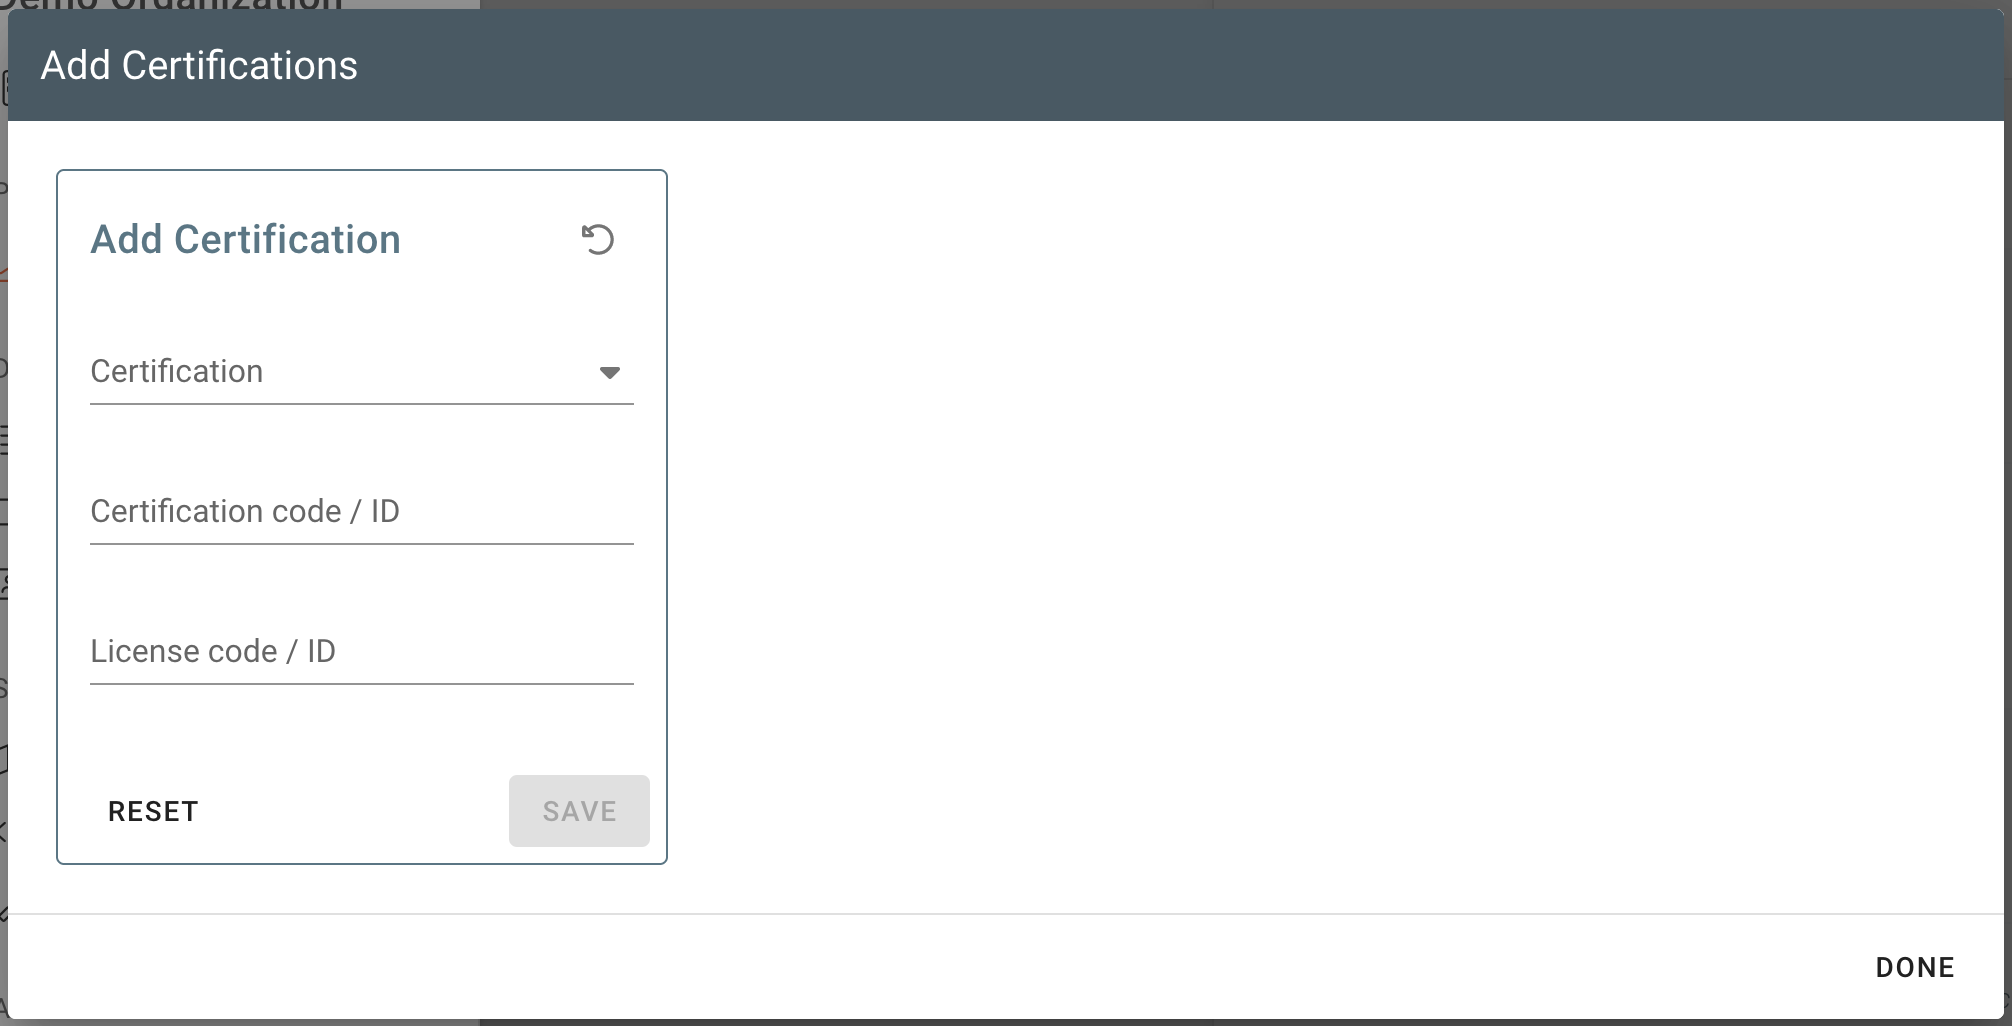
Certifications
Click the + icon open the Add Certifications window. From the Certification dropdown menu select the certification you are using. Fill out your Certification and License code/ID and click SAVE.
Repeat the process to add another certification.
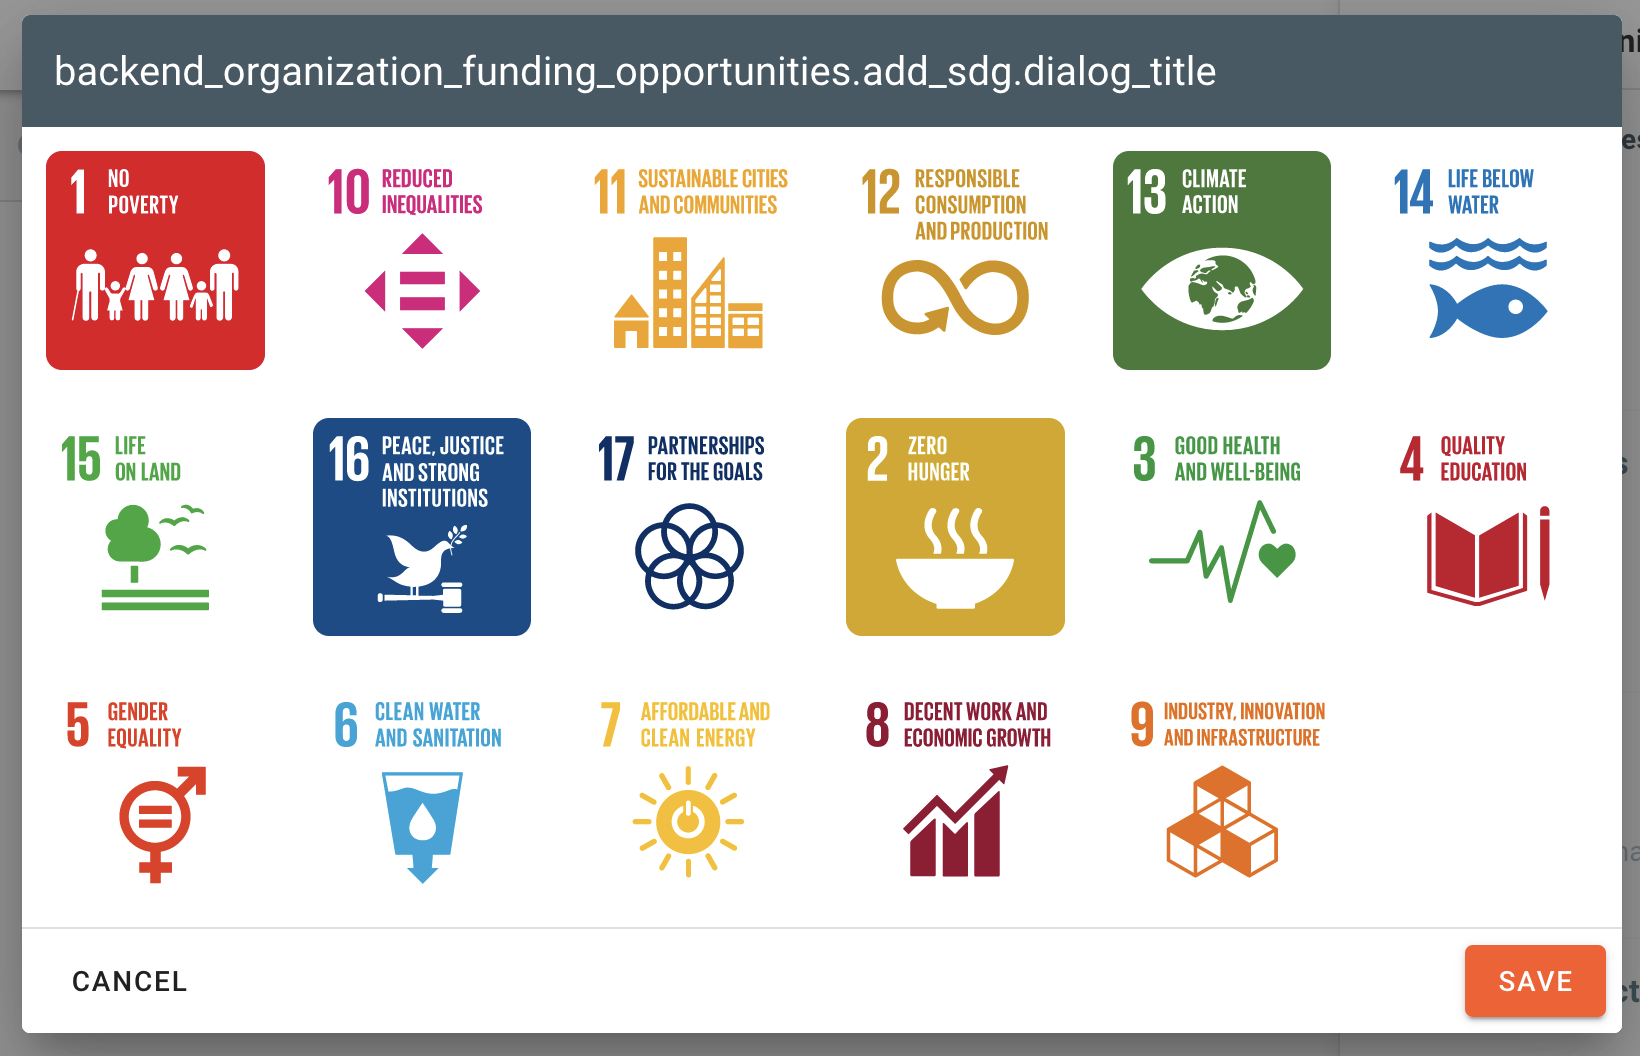
SDGs
Click the + icon open the Add SDGs window. From the SDGs pool, select the ones you want by clicking on them.
Click SAVE when finished.
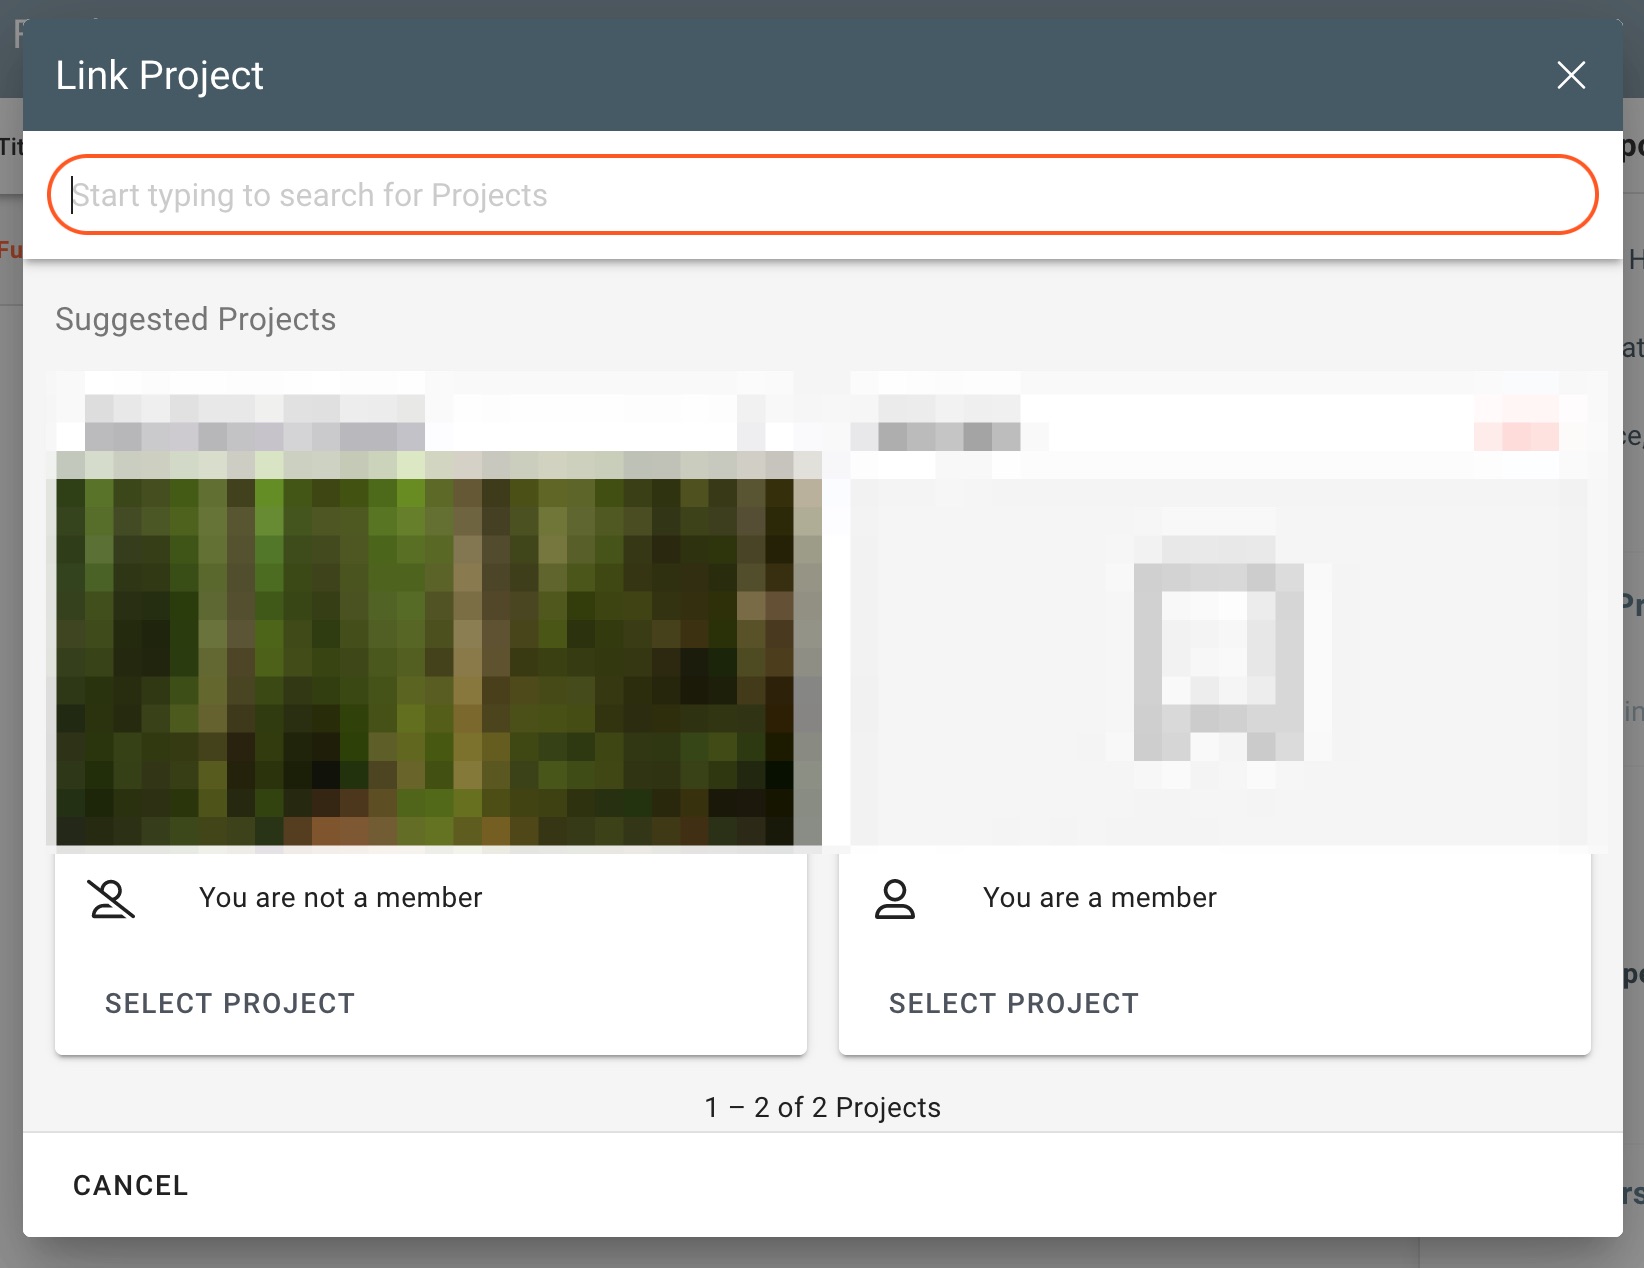
Linked Projects
Click the + icon open the Link Project window.
If the desired project is not in the suggested Projects, type in the projects title in the search bar. Click SELECT PROJECT to link it to you FO. You have to be a member of the project for it to be linked. If you're not an authorization request will be sent to that project's members.
Countries and Ecosystem types will automatically be imported from the project.
Partners
List the names of partner organizations involved in the execution of the project to be funded.
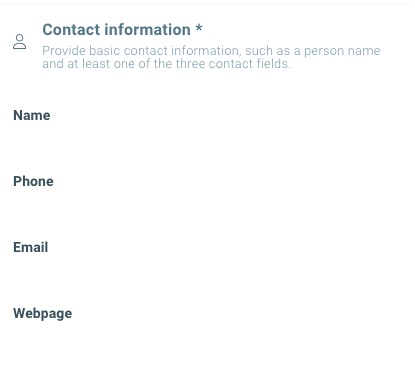
Contact information
Provide basic contact information, such as a person name and at least one of the three contact fields.
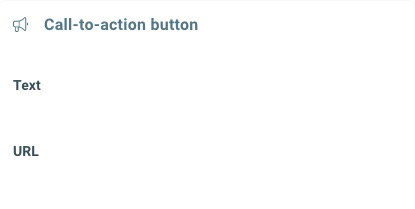
Call-to-action button
To activate the Call-to-action button on your FO, fill out the desired text and indicate the URL to which the call-to-action button should redirect.
After filling out all the necessary information click PUBLISH to publish the FO.
If you're having trouble publishing your FO, revisit the "publish cheklist information" on the top of the FO details page (i icon) or contact support@openforests.com.