Micro-Sites Campaigns (MSC) is a feature that allows you to assign a great number of polygons describing a (smaller) plot of land (the so-called “Micro-Sites”, or MS for short) with a unique ID and respective URL to products, clients or campaign participants. These URLs can also be represented by a QR-code. Through that URL (or QR-code) the client or participant will be able to access and view the respectively allocated polygon on explorer.land’s map within the context of the whole project.
To activate the MSC module for your project, please contact support@openforests.com
Creating a Micro-Sites Campaign
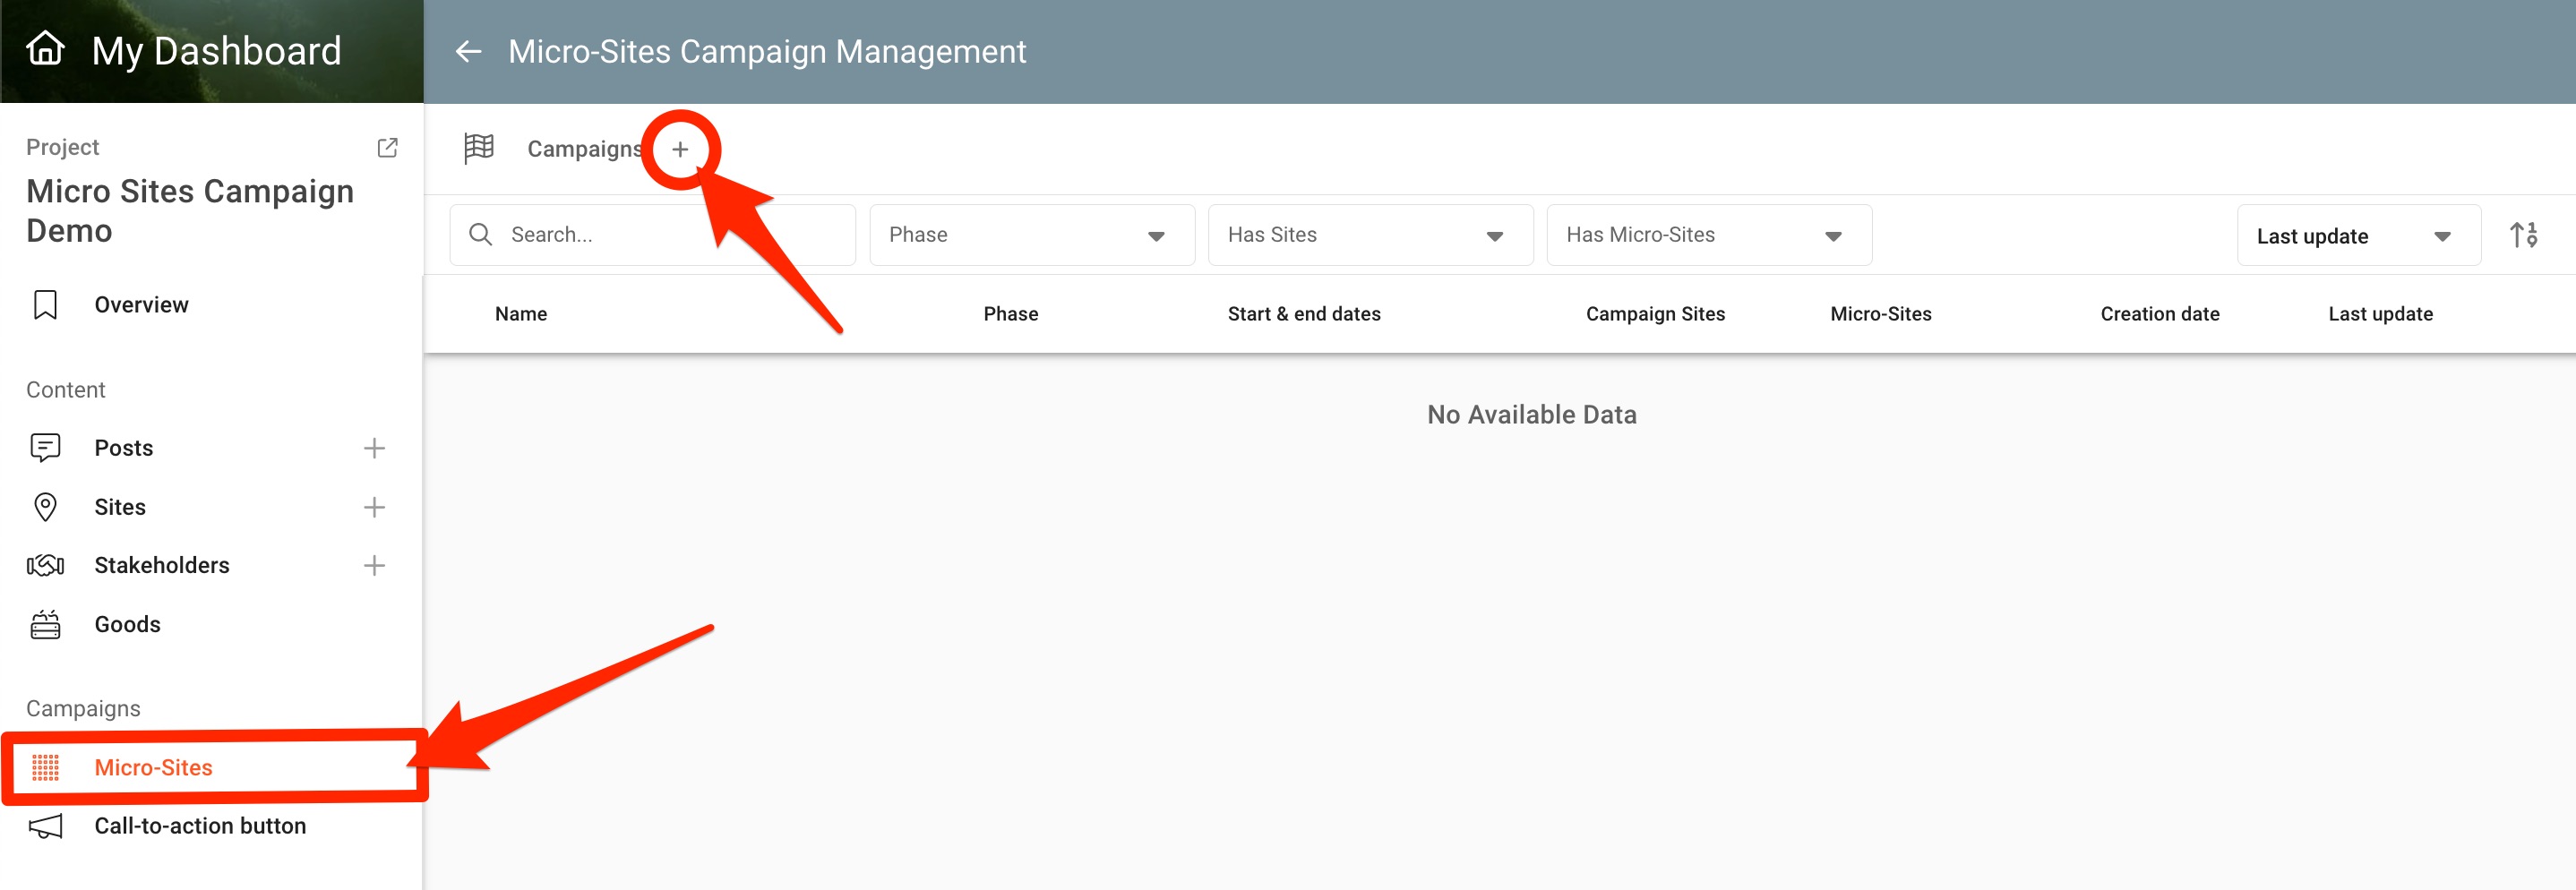
Once your MSC module is activated go to Micro-Sites on the Campaigns menu on the left side of your project overview page. The Micro-Sites Campaign Management page will open. To create a new Campaign click on the + icon.
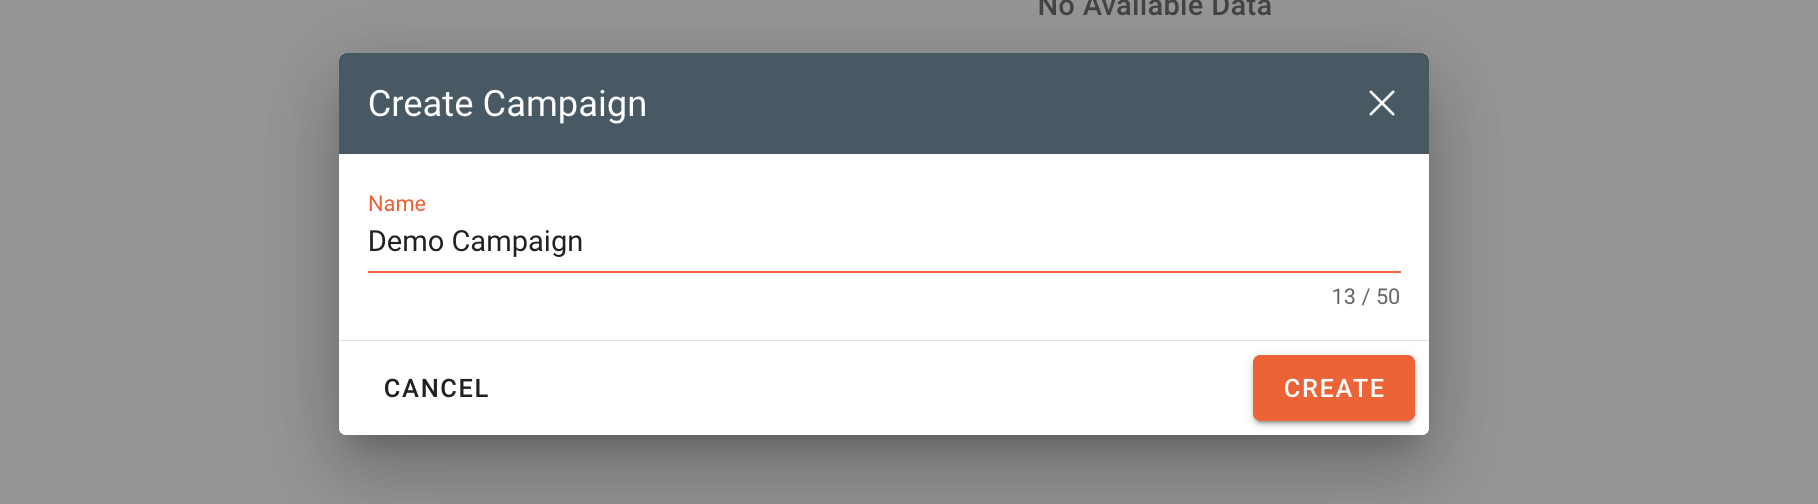
Next, name your campaign and click CREATE.
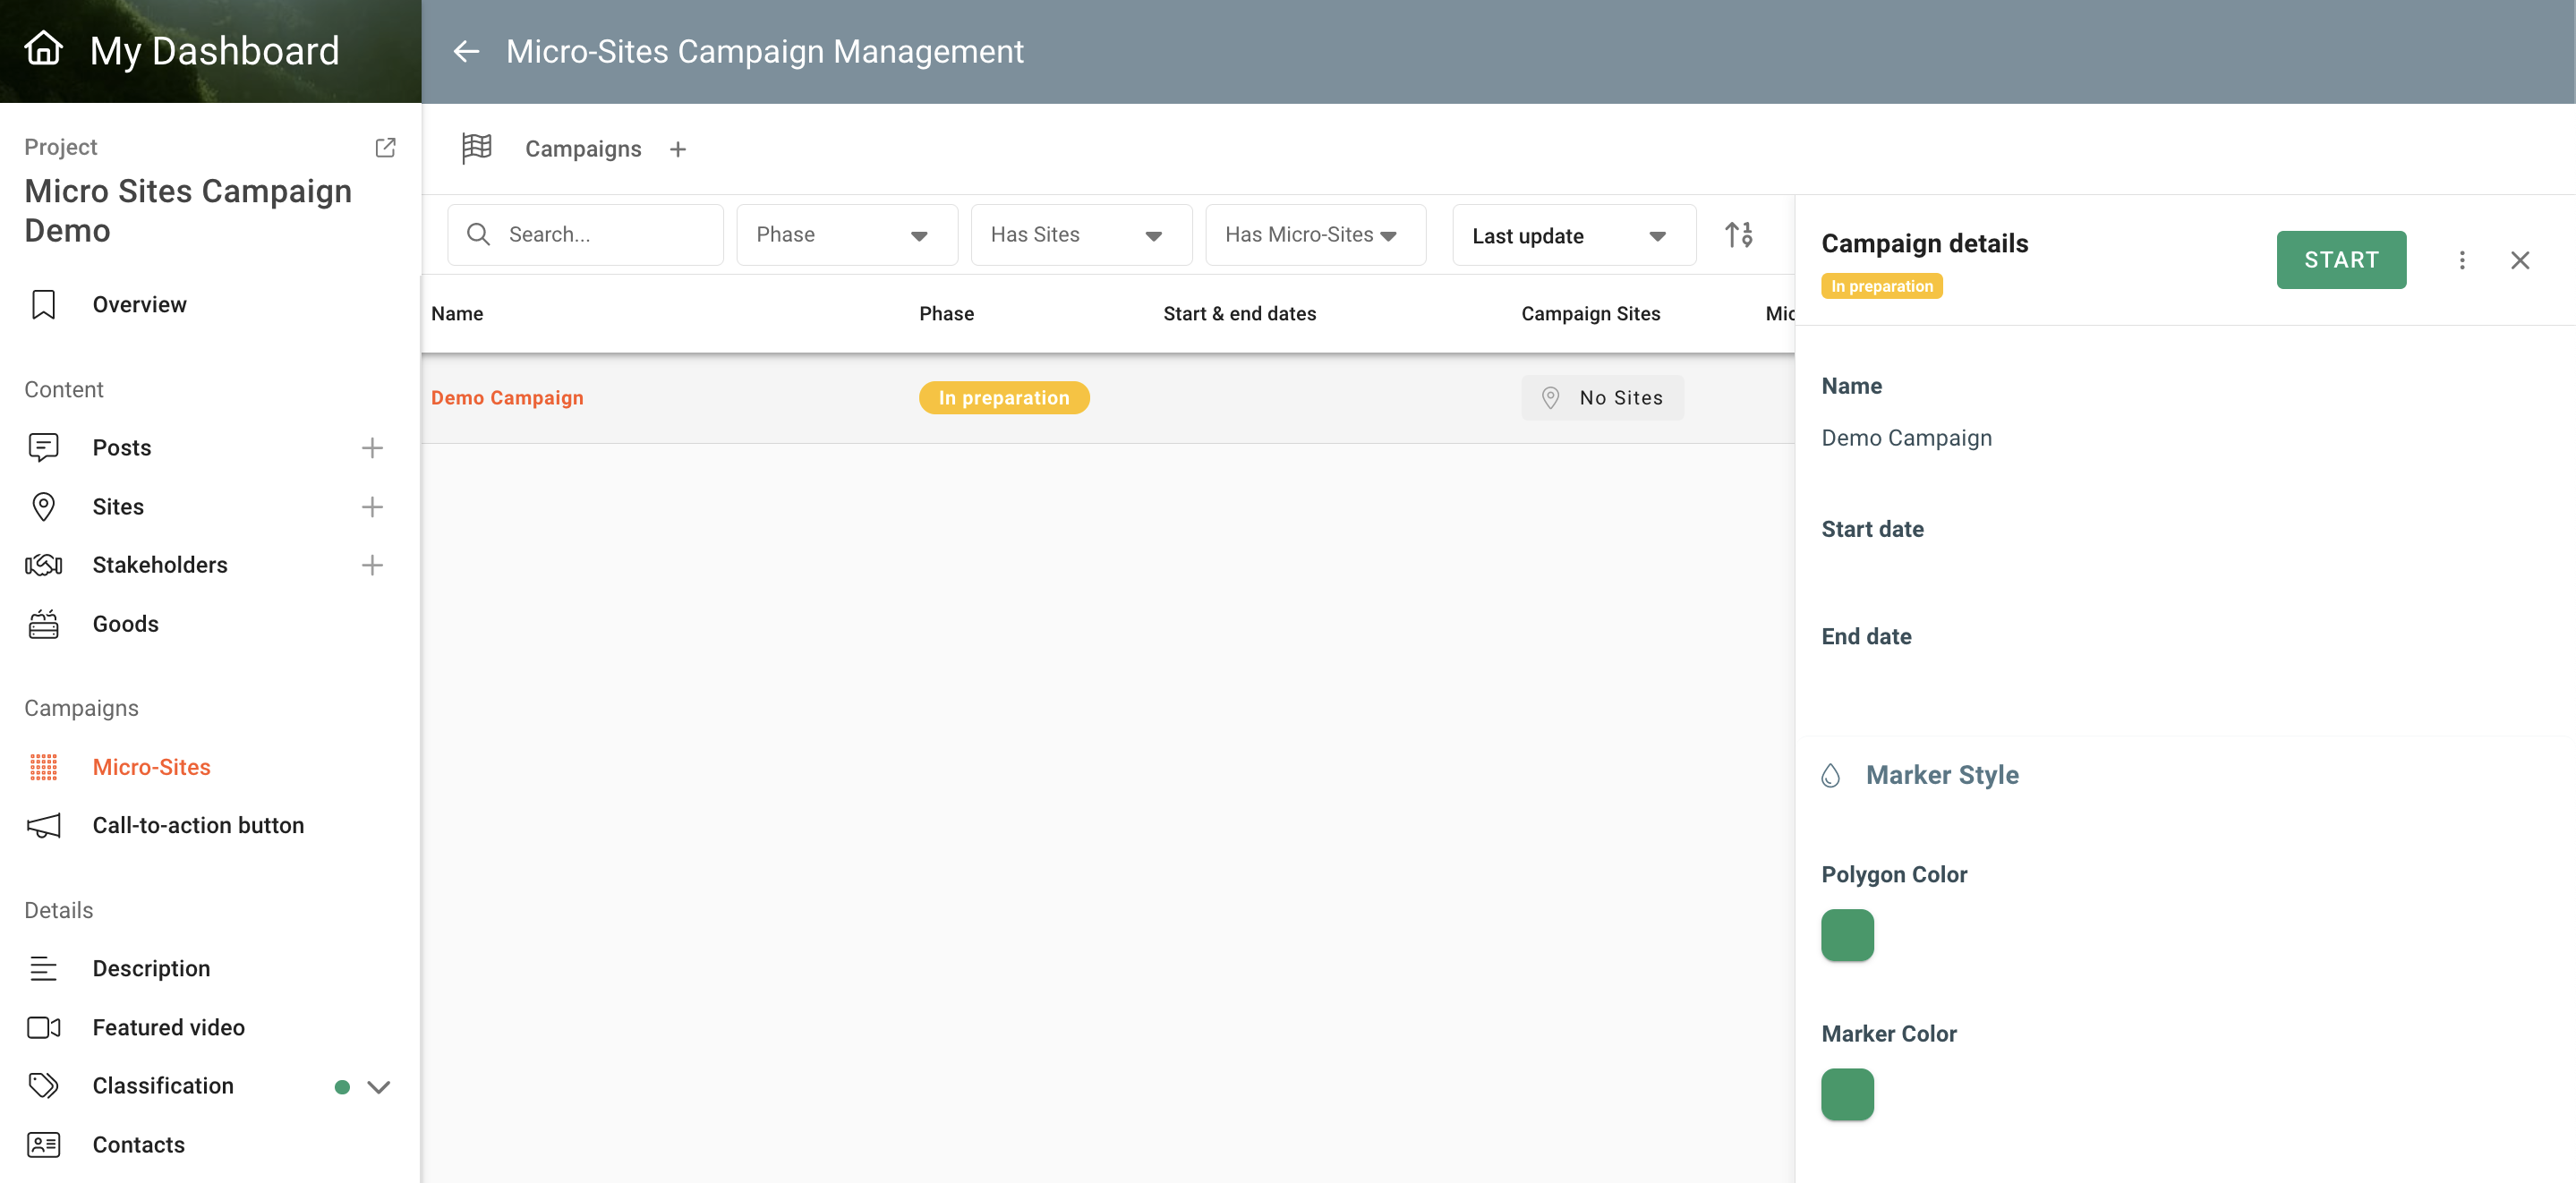
Your new campaign will now appear in the campaigns list. Click on the campaign to open or close the campaign details column.
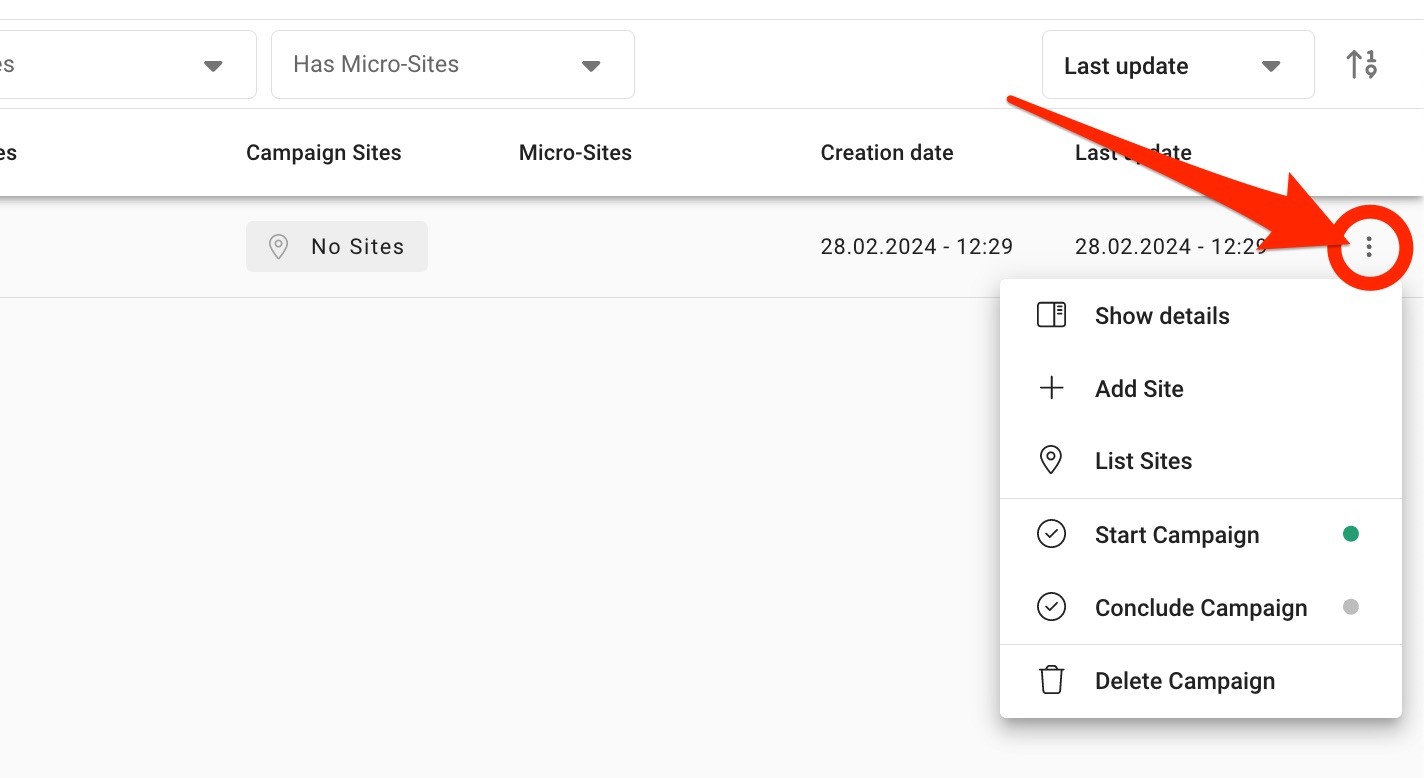
Or click the 3 dots icon on the left end of the campaign for more options.
On the campaign details column you are able to:
- Change the campaign status to Active (Start Campaign), In preparation (Prepare Campaign) or Concluded (Conclude Campaign) by clicking the green START button or the 3 dots icon next to it.
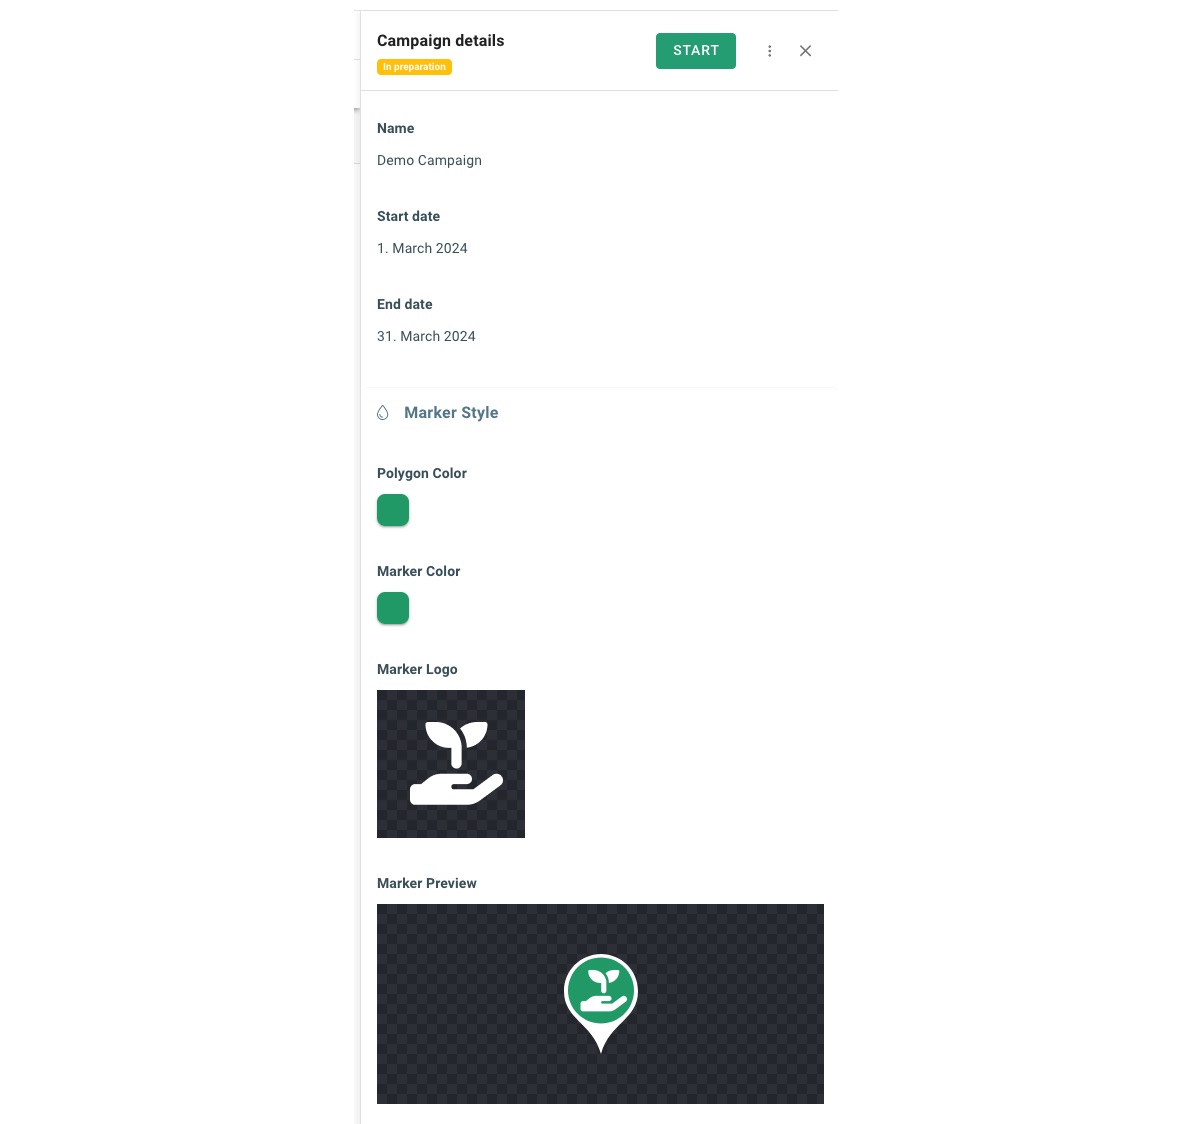
- Edit the name and set a starting and ending date of the campaign.
- Customize the marker design of the campaign by editing the polygon color, marker color and uploading a logo (transparency with png). At the bottom you can see a preview of the marker.
Adding a site
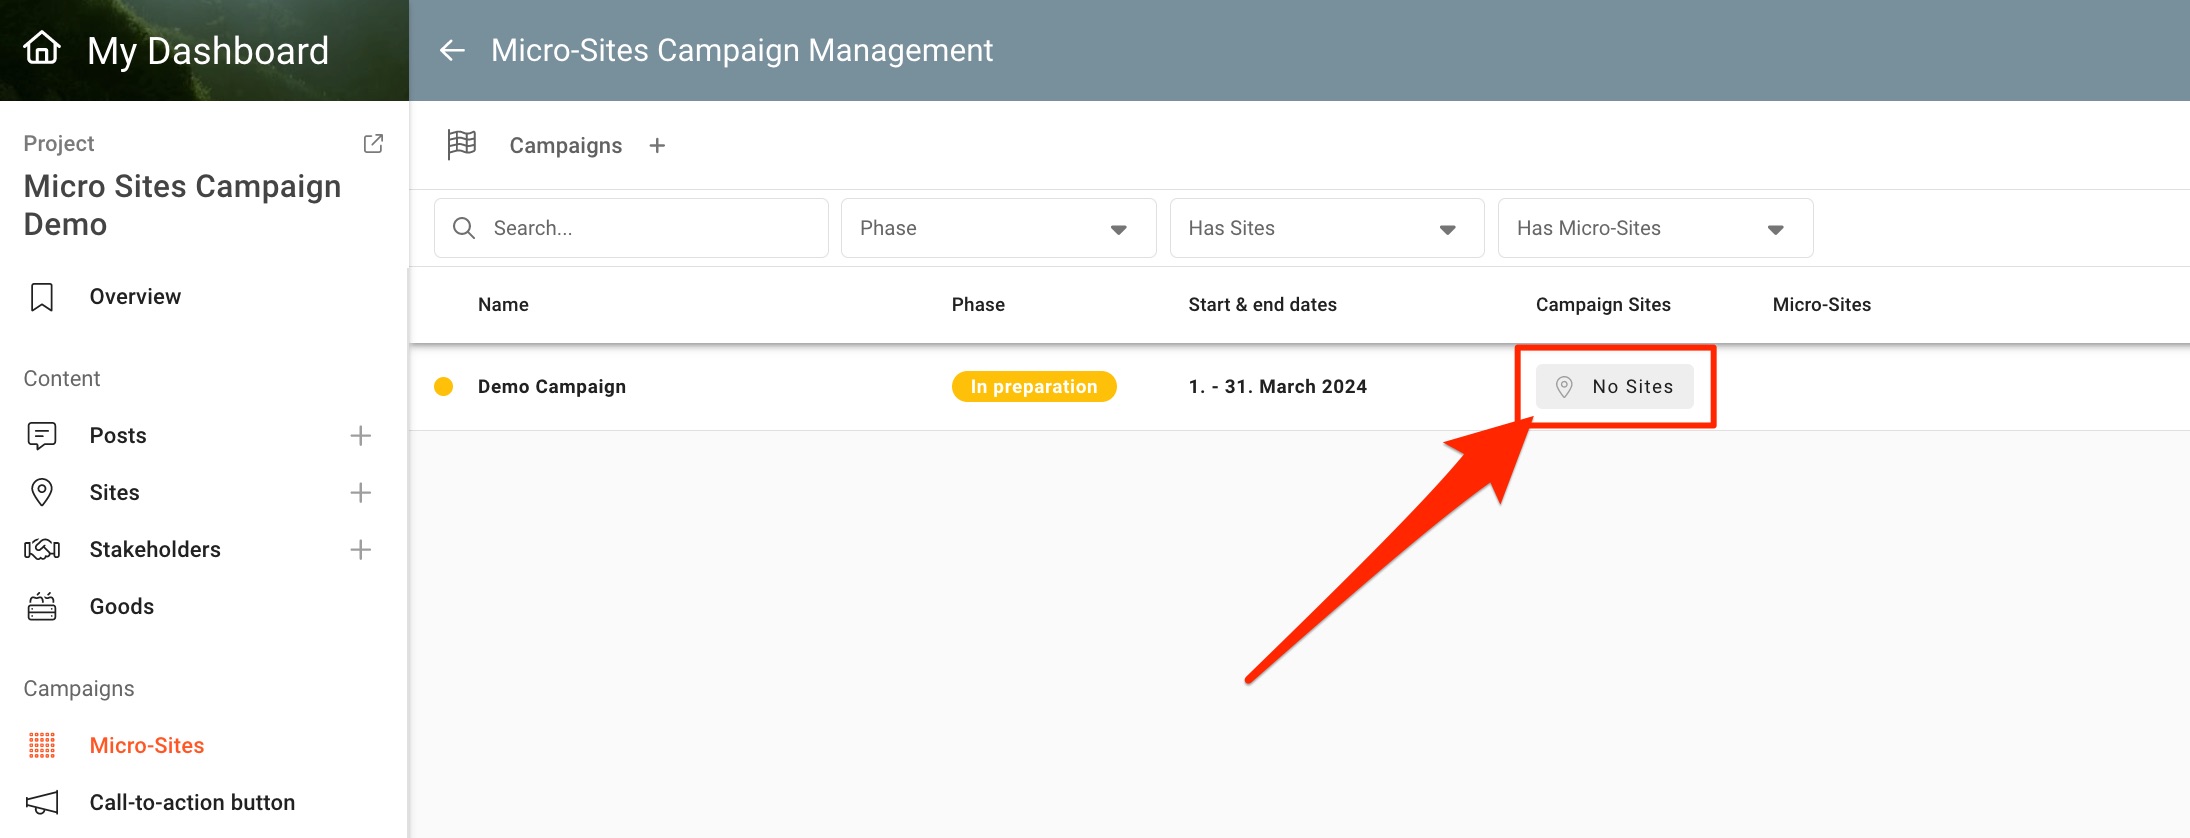
To run a MSC you need a site on your project where the Micro-Sites are going to be included. To start the process of adding an existing site on you project to your campaign, click on the No Sites icon on your campaign.
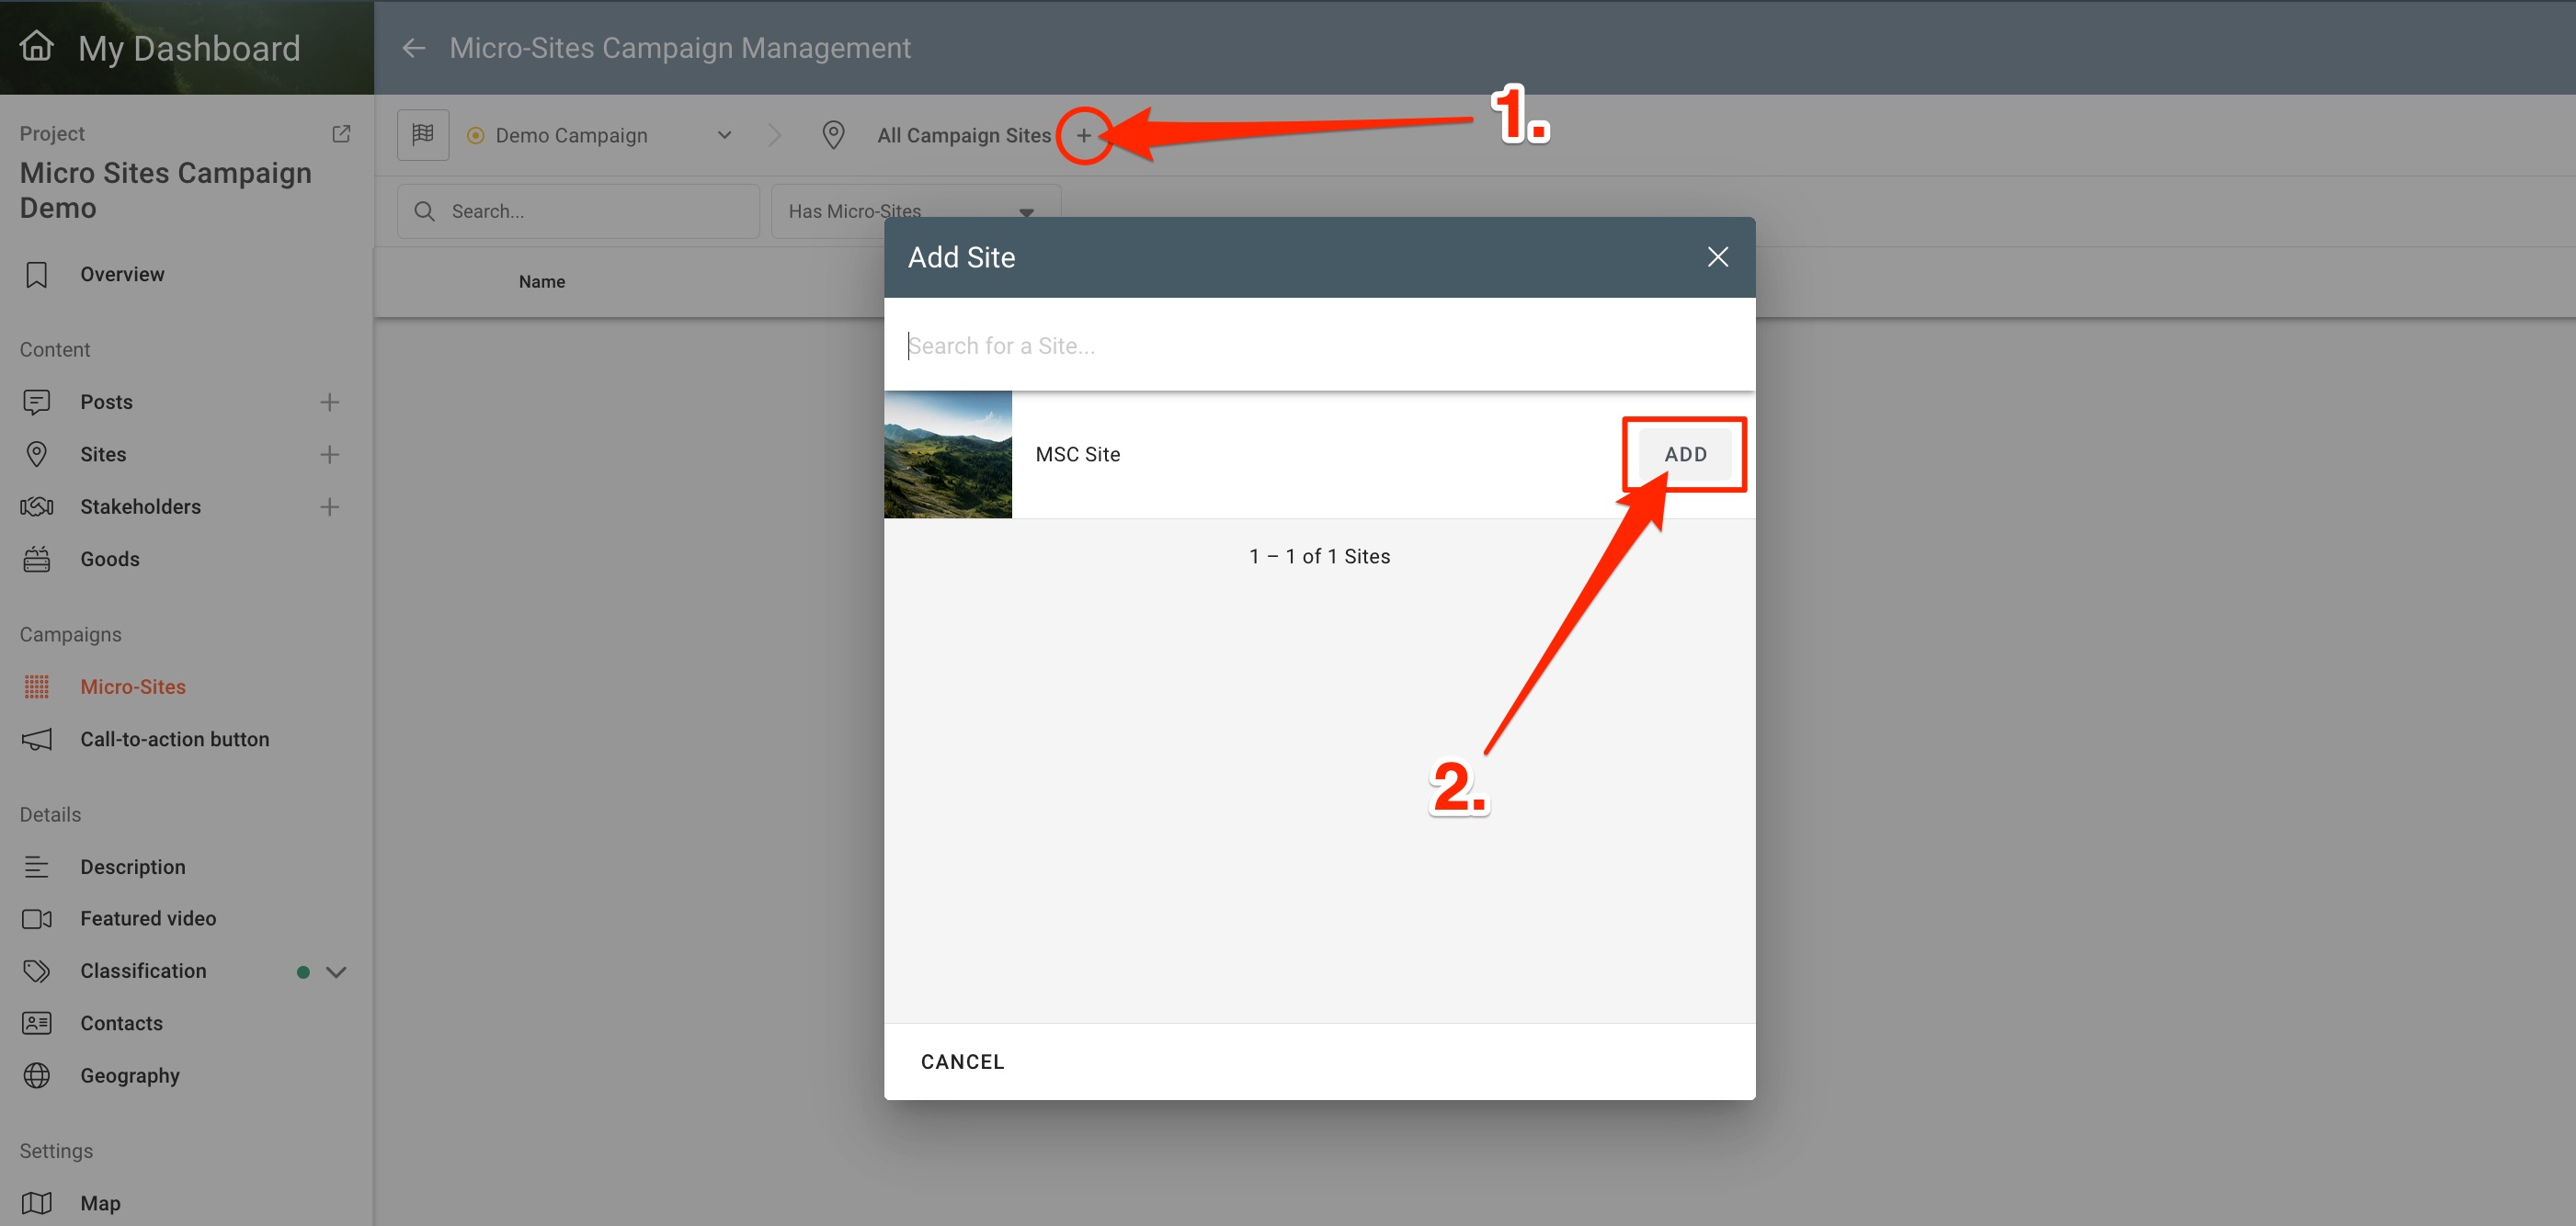
The Campaign Sites list will open, which at this point will still be empty. To continue the process of adding a site, 1. click on the + icon in front of All Campaign sites, 2. on the Add Site window pick one site from you project by clicking on ADD.
The selected site will now appear in the All Campaign Sites list. Click on the site to open or close the site details column.
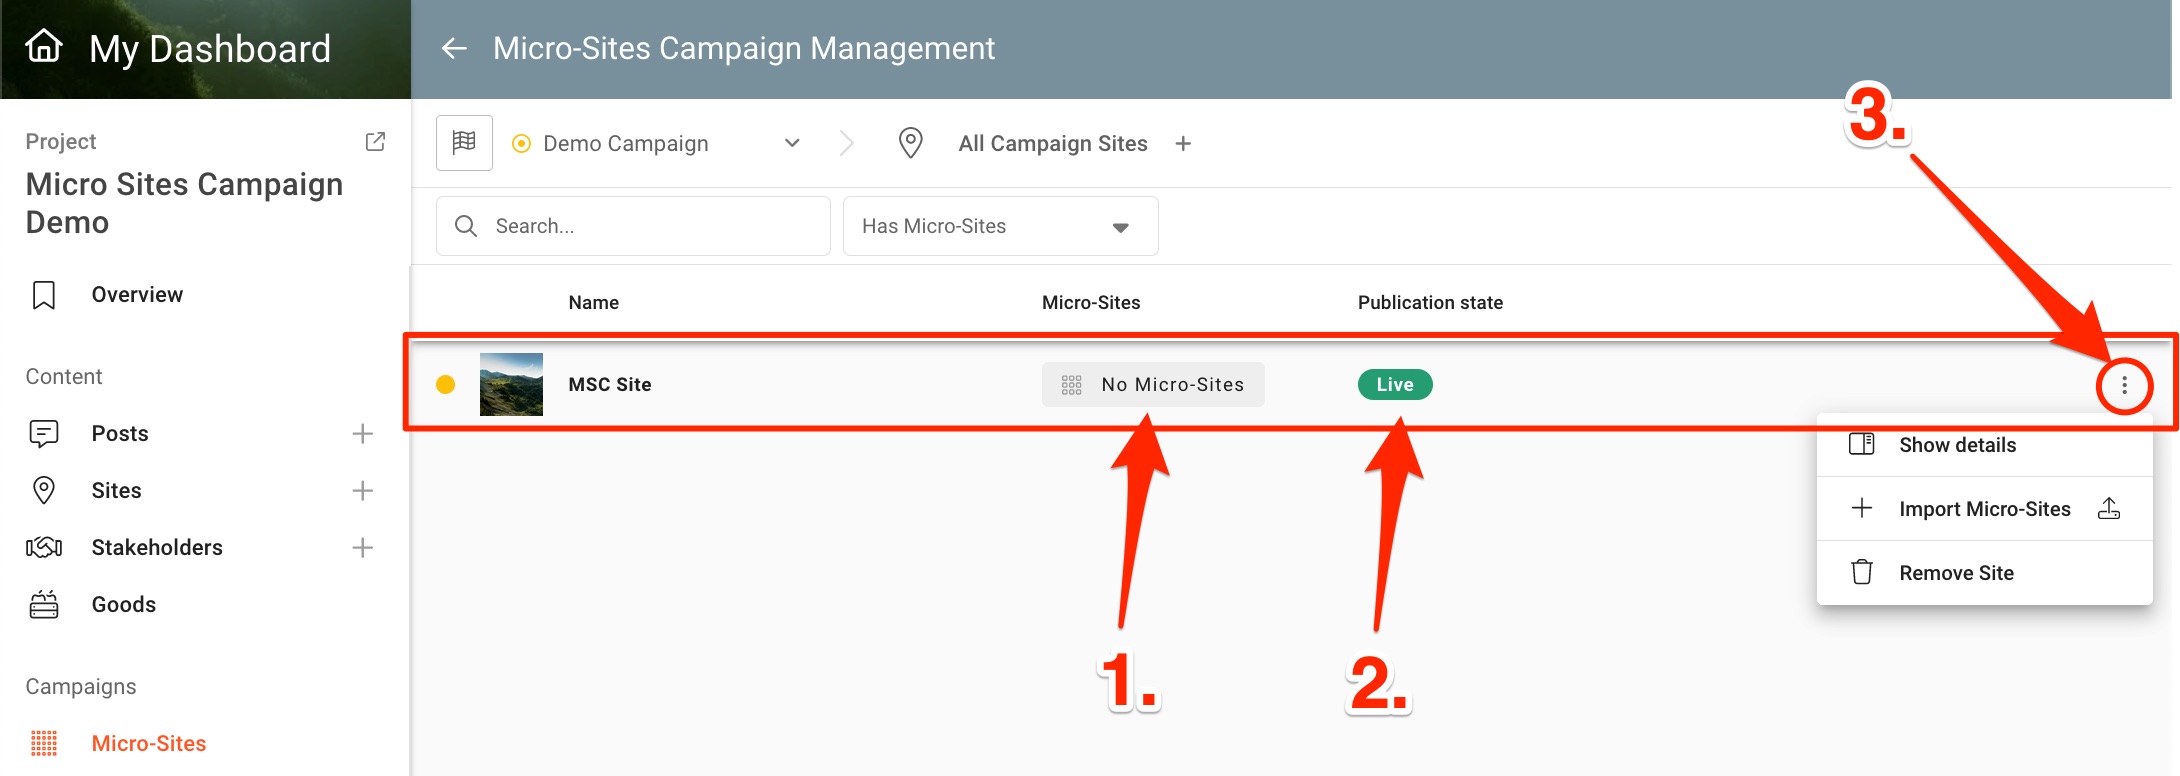
In the site bar you can see 1. if you aready have Micro-Sites in the site or not, 2. if the site you selected is published or on draft and 3. the 3 dots icon with more options (show details, Import Micro-Sites and Remove Site).
Importing Micro-Sites
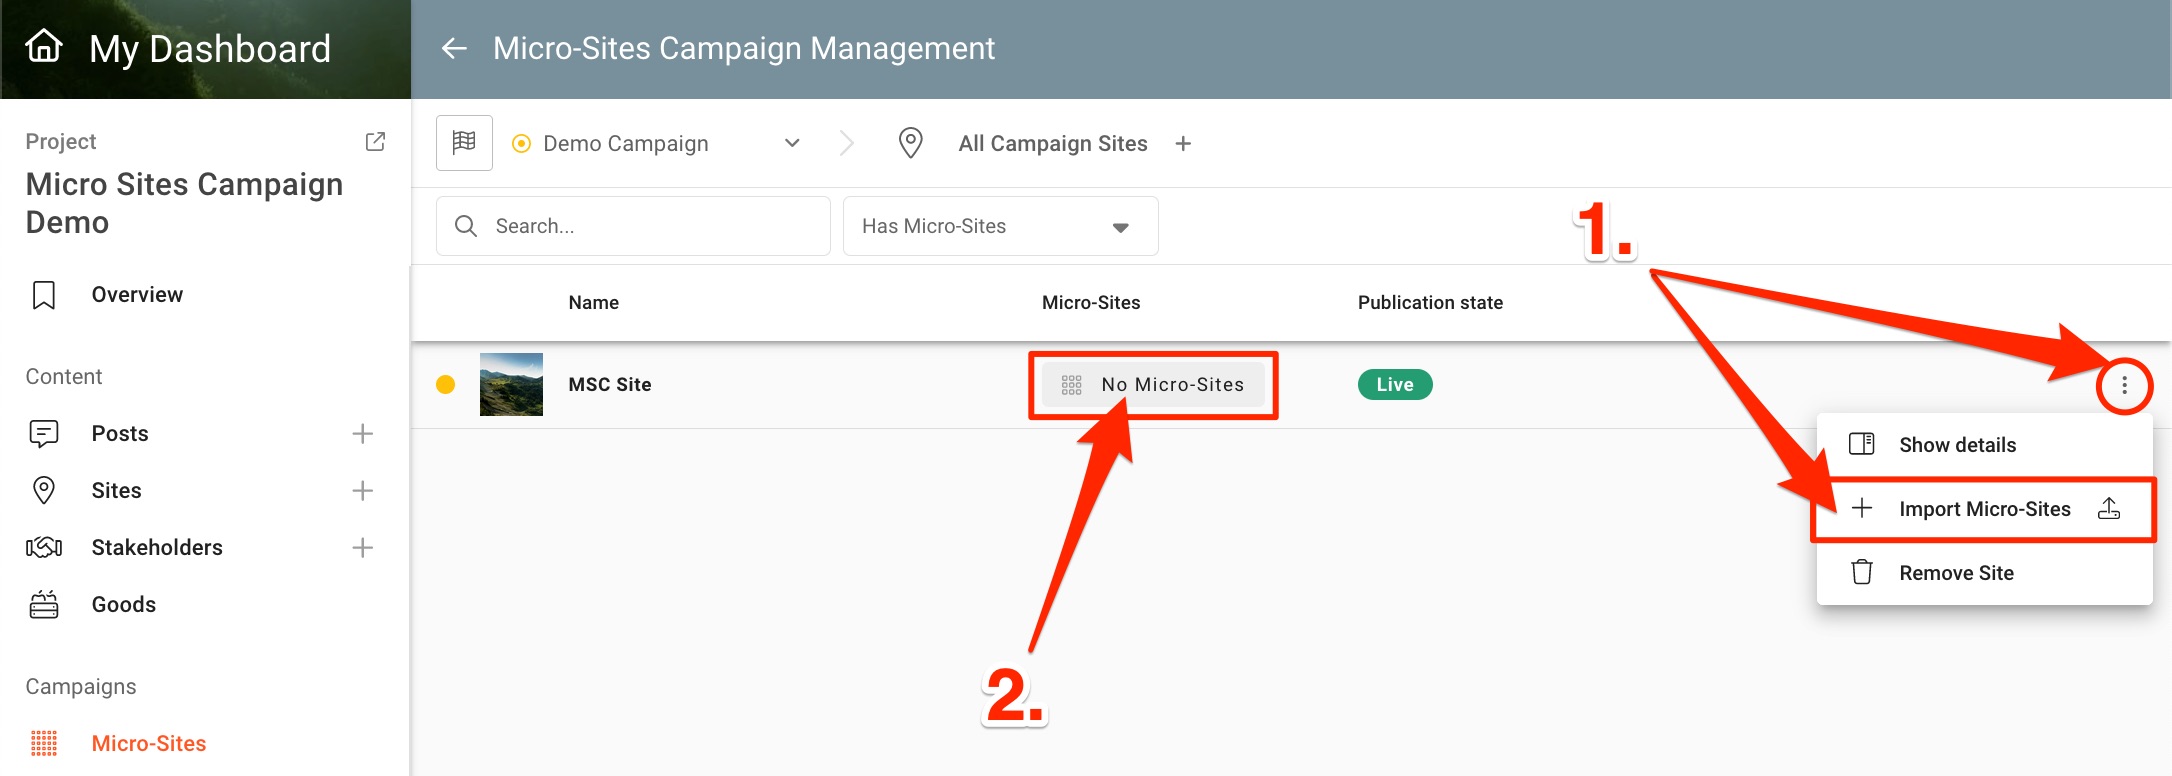
There are 2 ways to import Micro-Sites. 1. Directly click Import Micro-Sites in the other options (three dots icon) menu. A window will appear where you can upload the geojson file, or 2. click on the No Micro-Sites__ button to open the Micro-Sites list page.
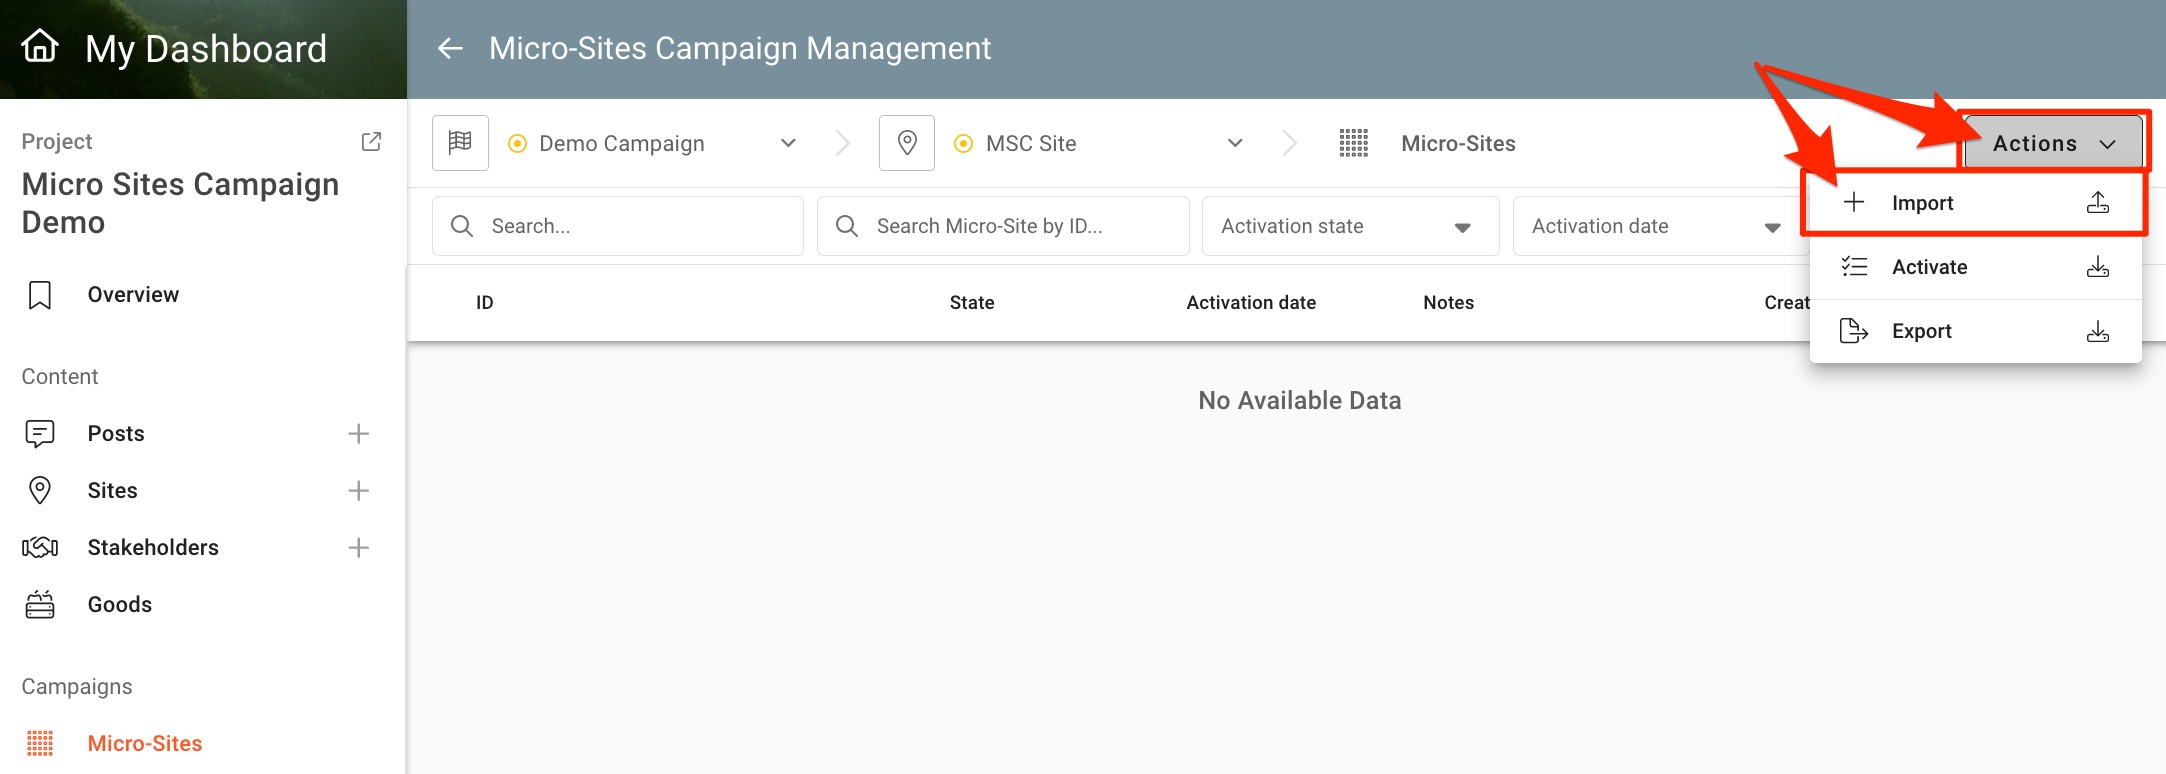
On the Micro-Sites list page, which at this point will still be empty, click the Actions dropdown button and then Import. A window will appear where you can upload the geojson file.
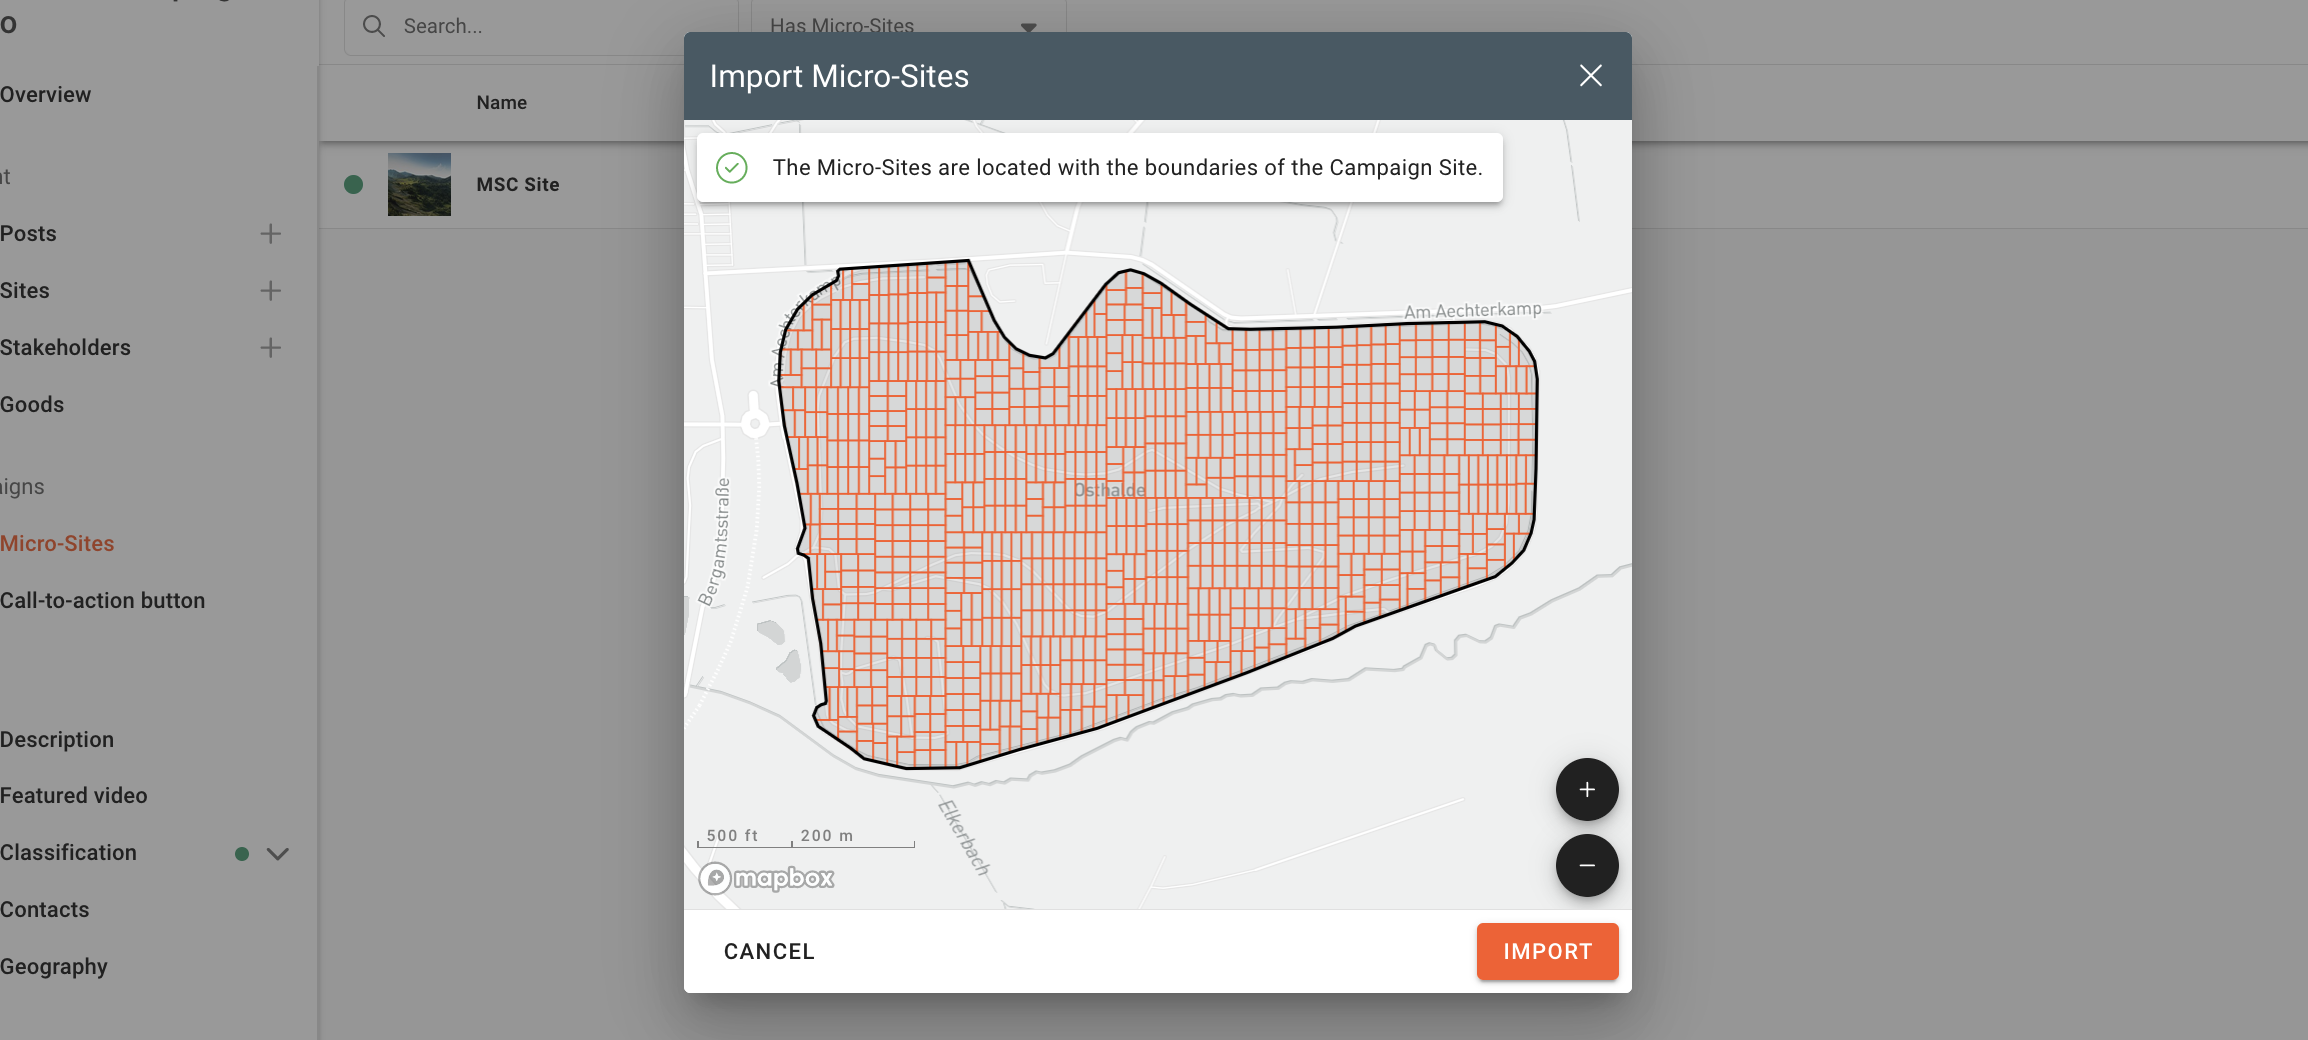
After uploading the geojson file with the Micro-Sites, a window will show if the Micro-Sites are indeed within the site you are importing them into. If a green checkmark and the text "The Micro-Sites are located with the boundaries of the Campaign Site." appear on the top of the window, then everything is ok. Click IMPORT.
Activating and using the Micro-Sites
The Micro-Sites will now appear in the Micro-Sites list page. A unique ID will be assigned to each individual Micro-Site.
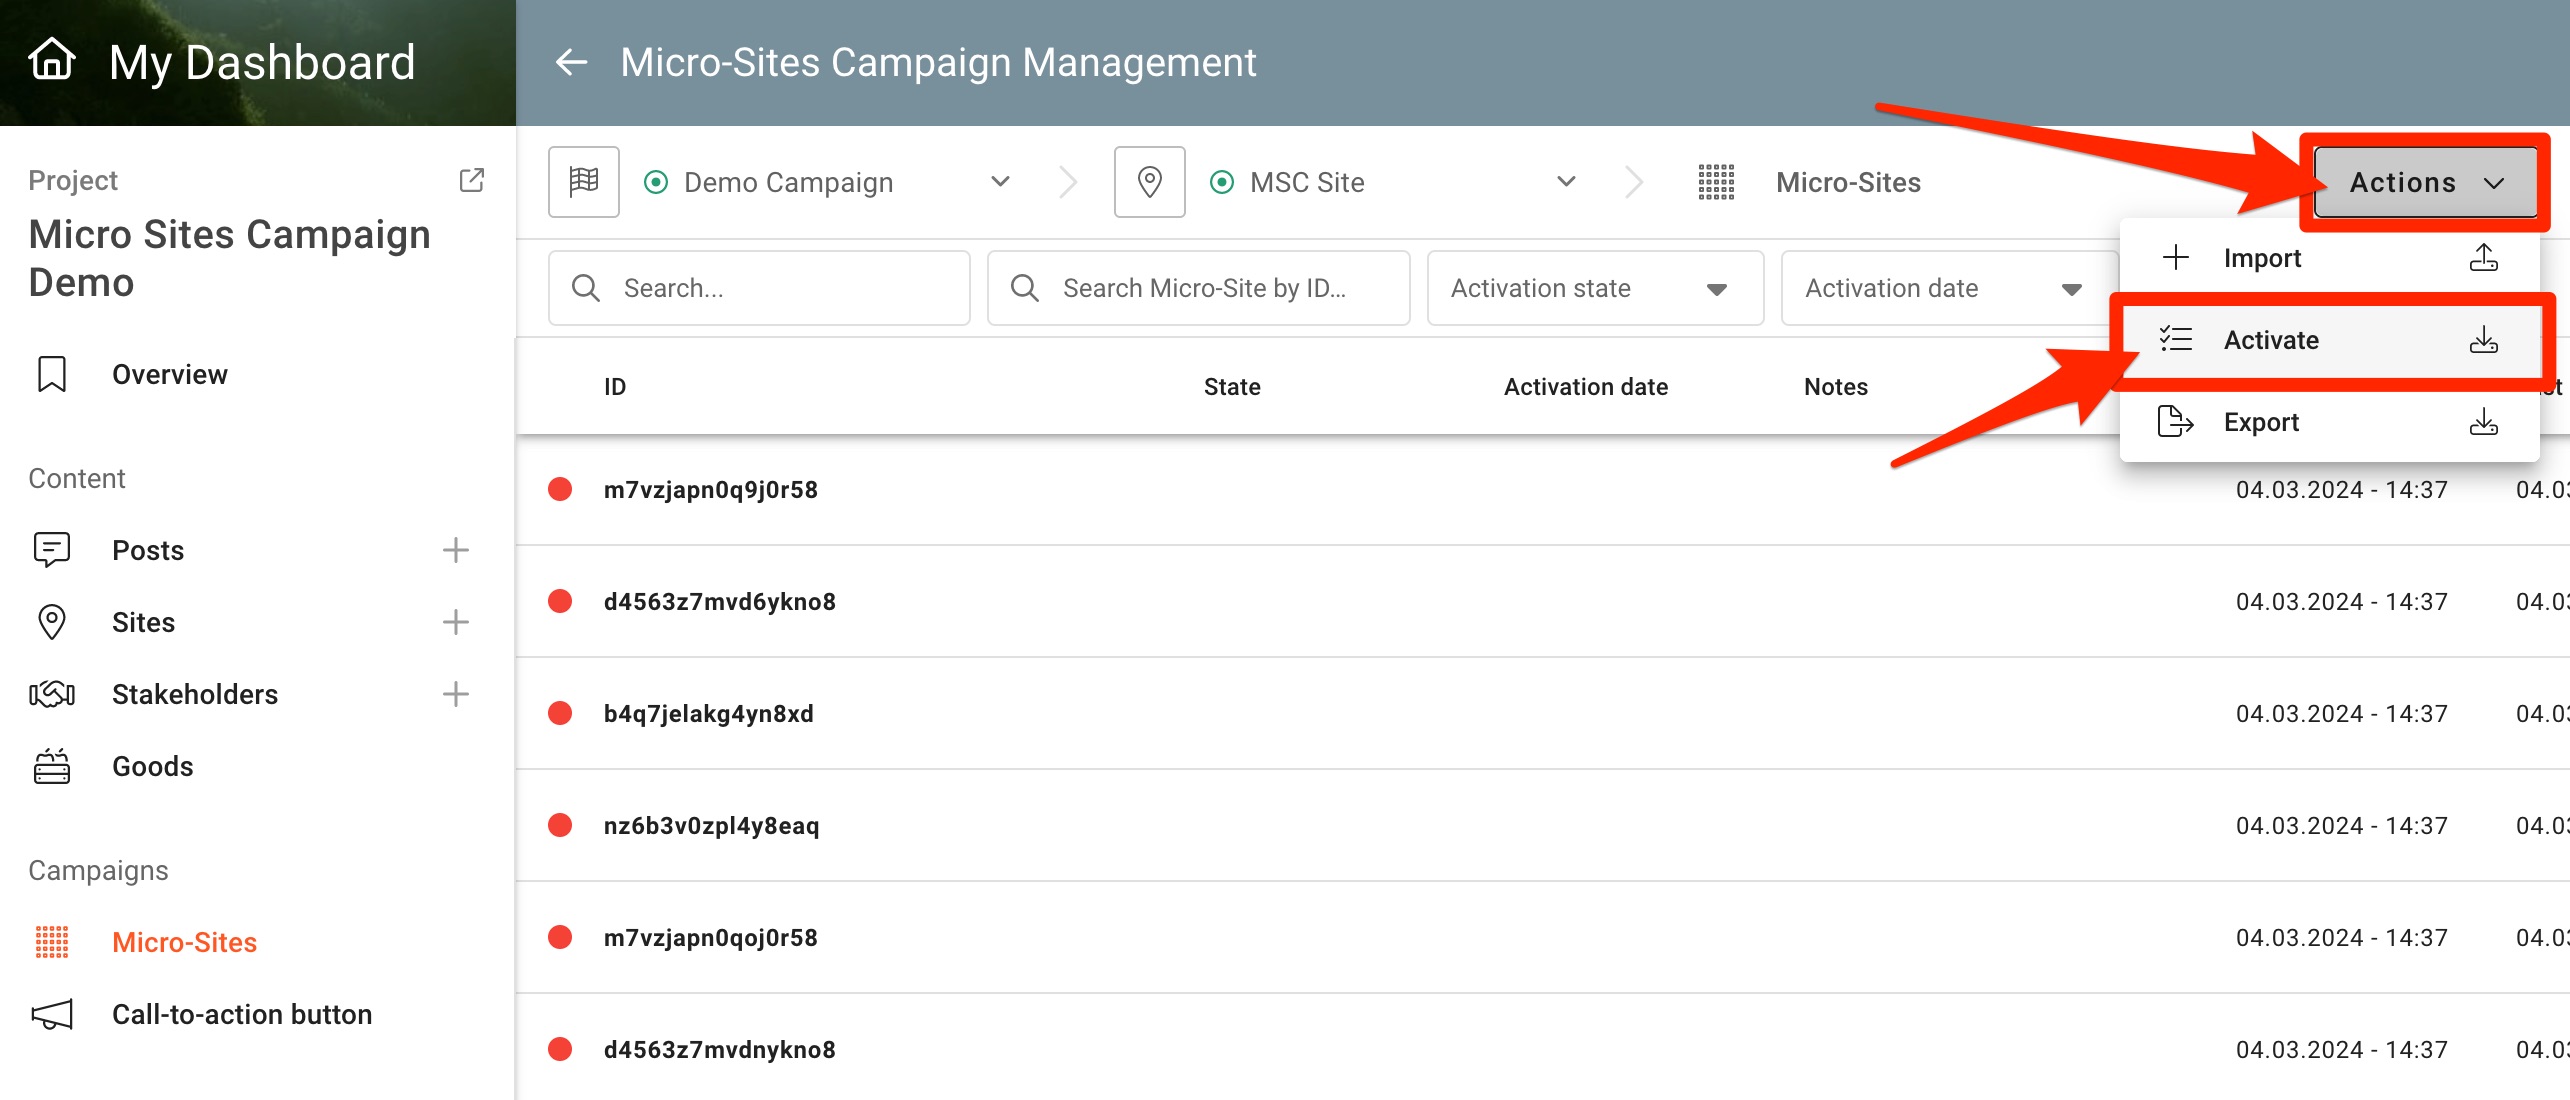
At this stage all Micro-Sites are inactive. To activate Micro-Sites for the campaign open the Actions dropdown menu und click Activate.
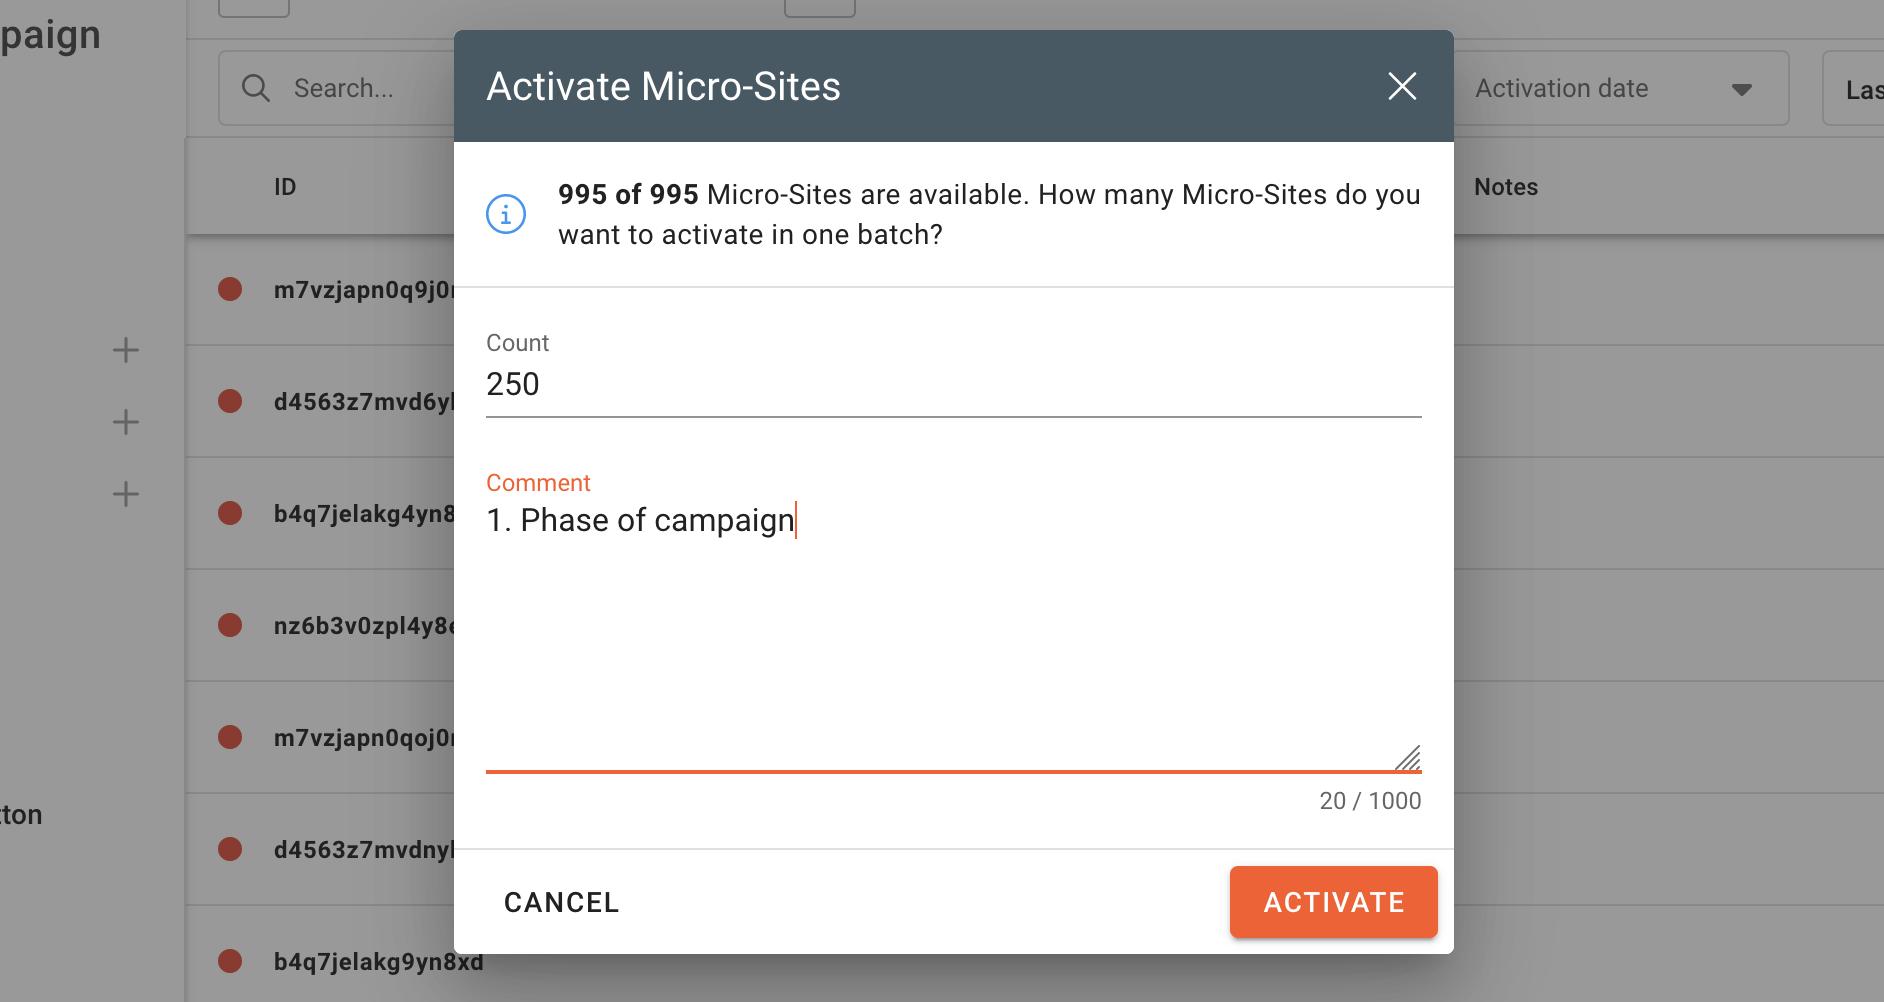
The Activate Micro-Sites window will open. Choose the amount of Micro-Sites to activate in the Count field and write a comment for future reference if needed. Click ACTIVATE.
An activation confirmation window will open, click ACTIVATE again to confirm.
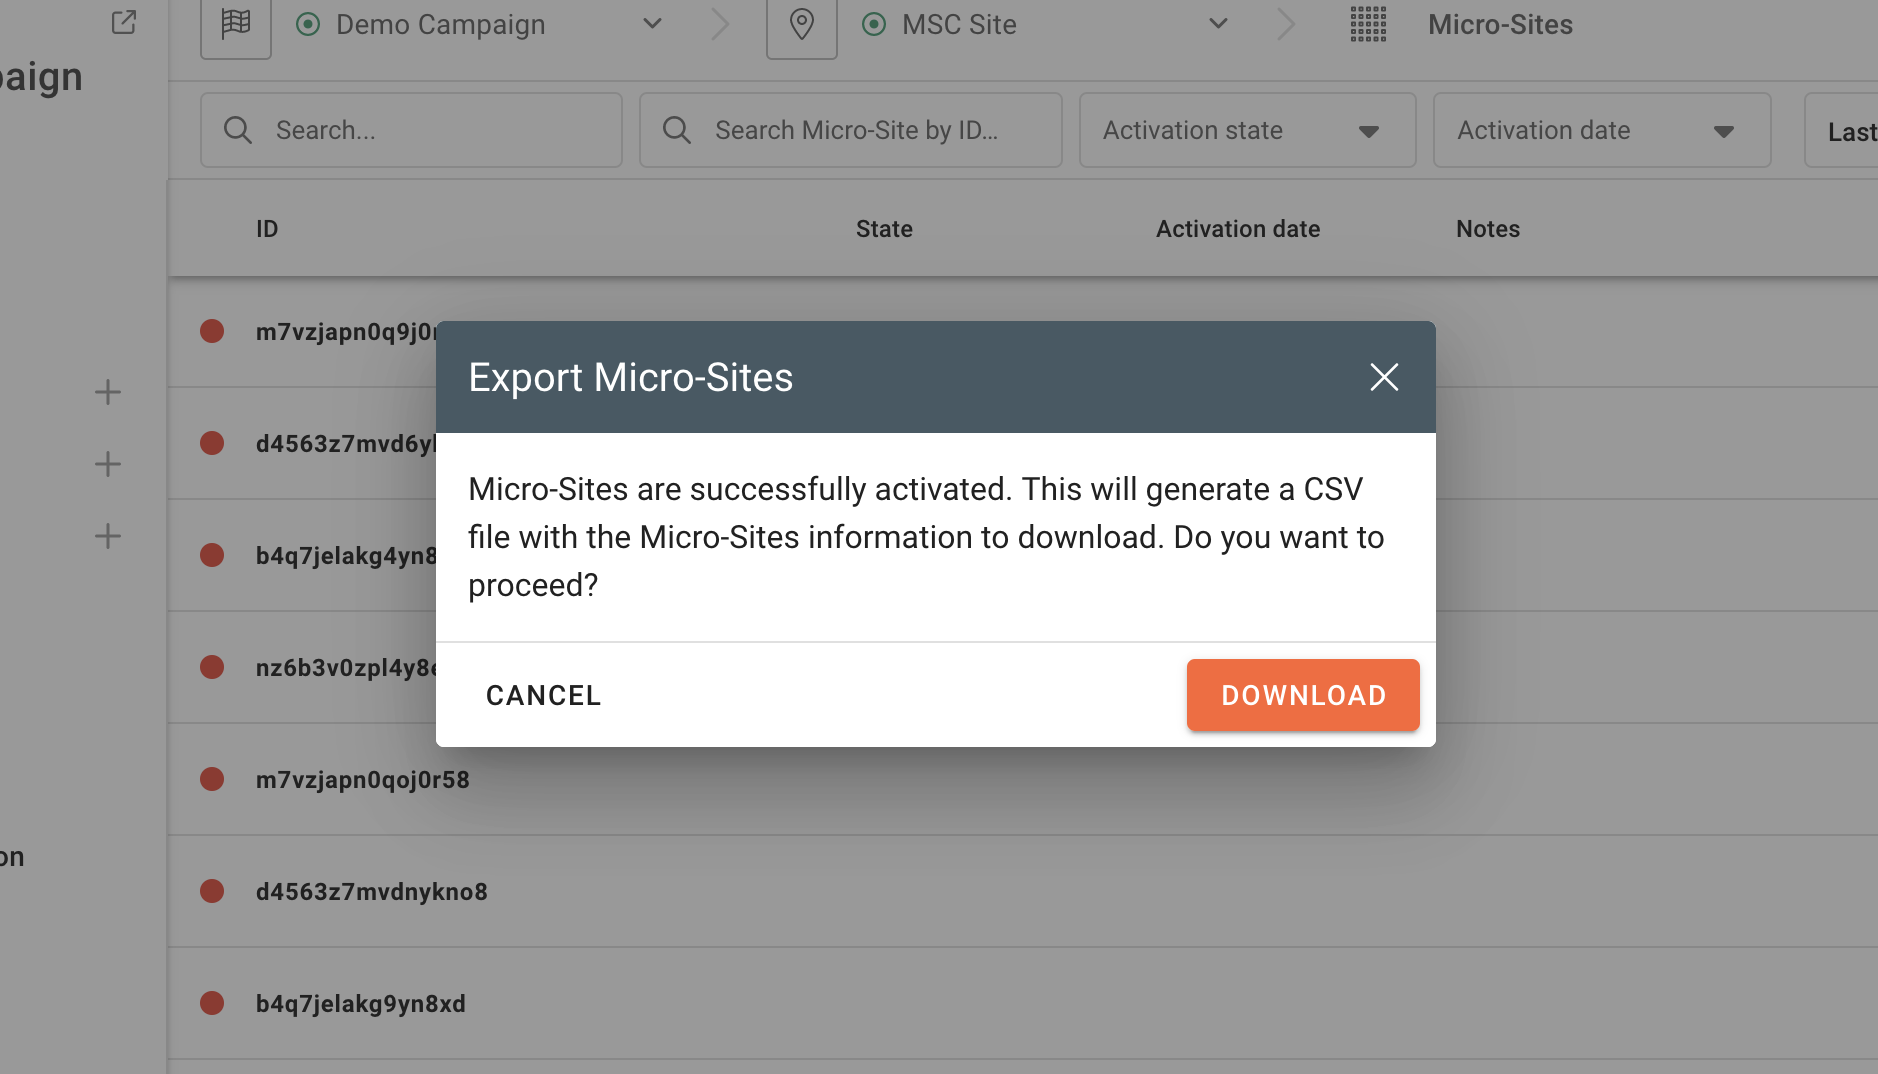
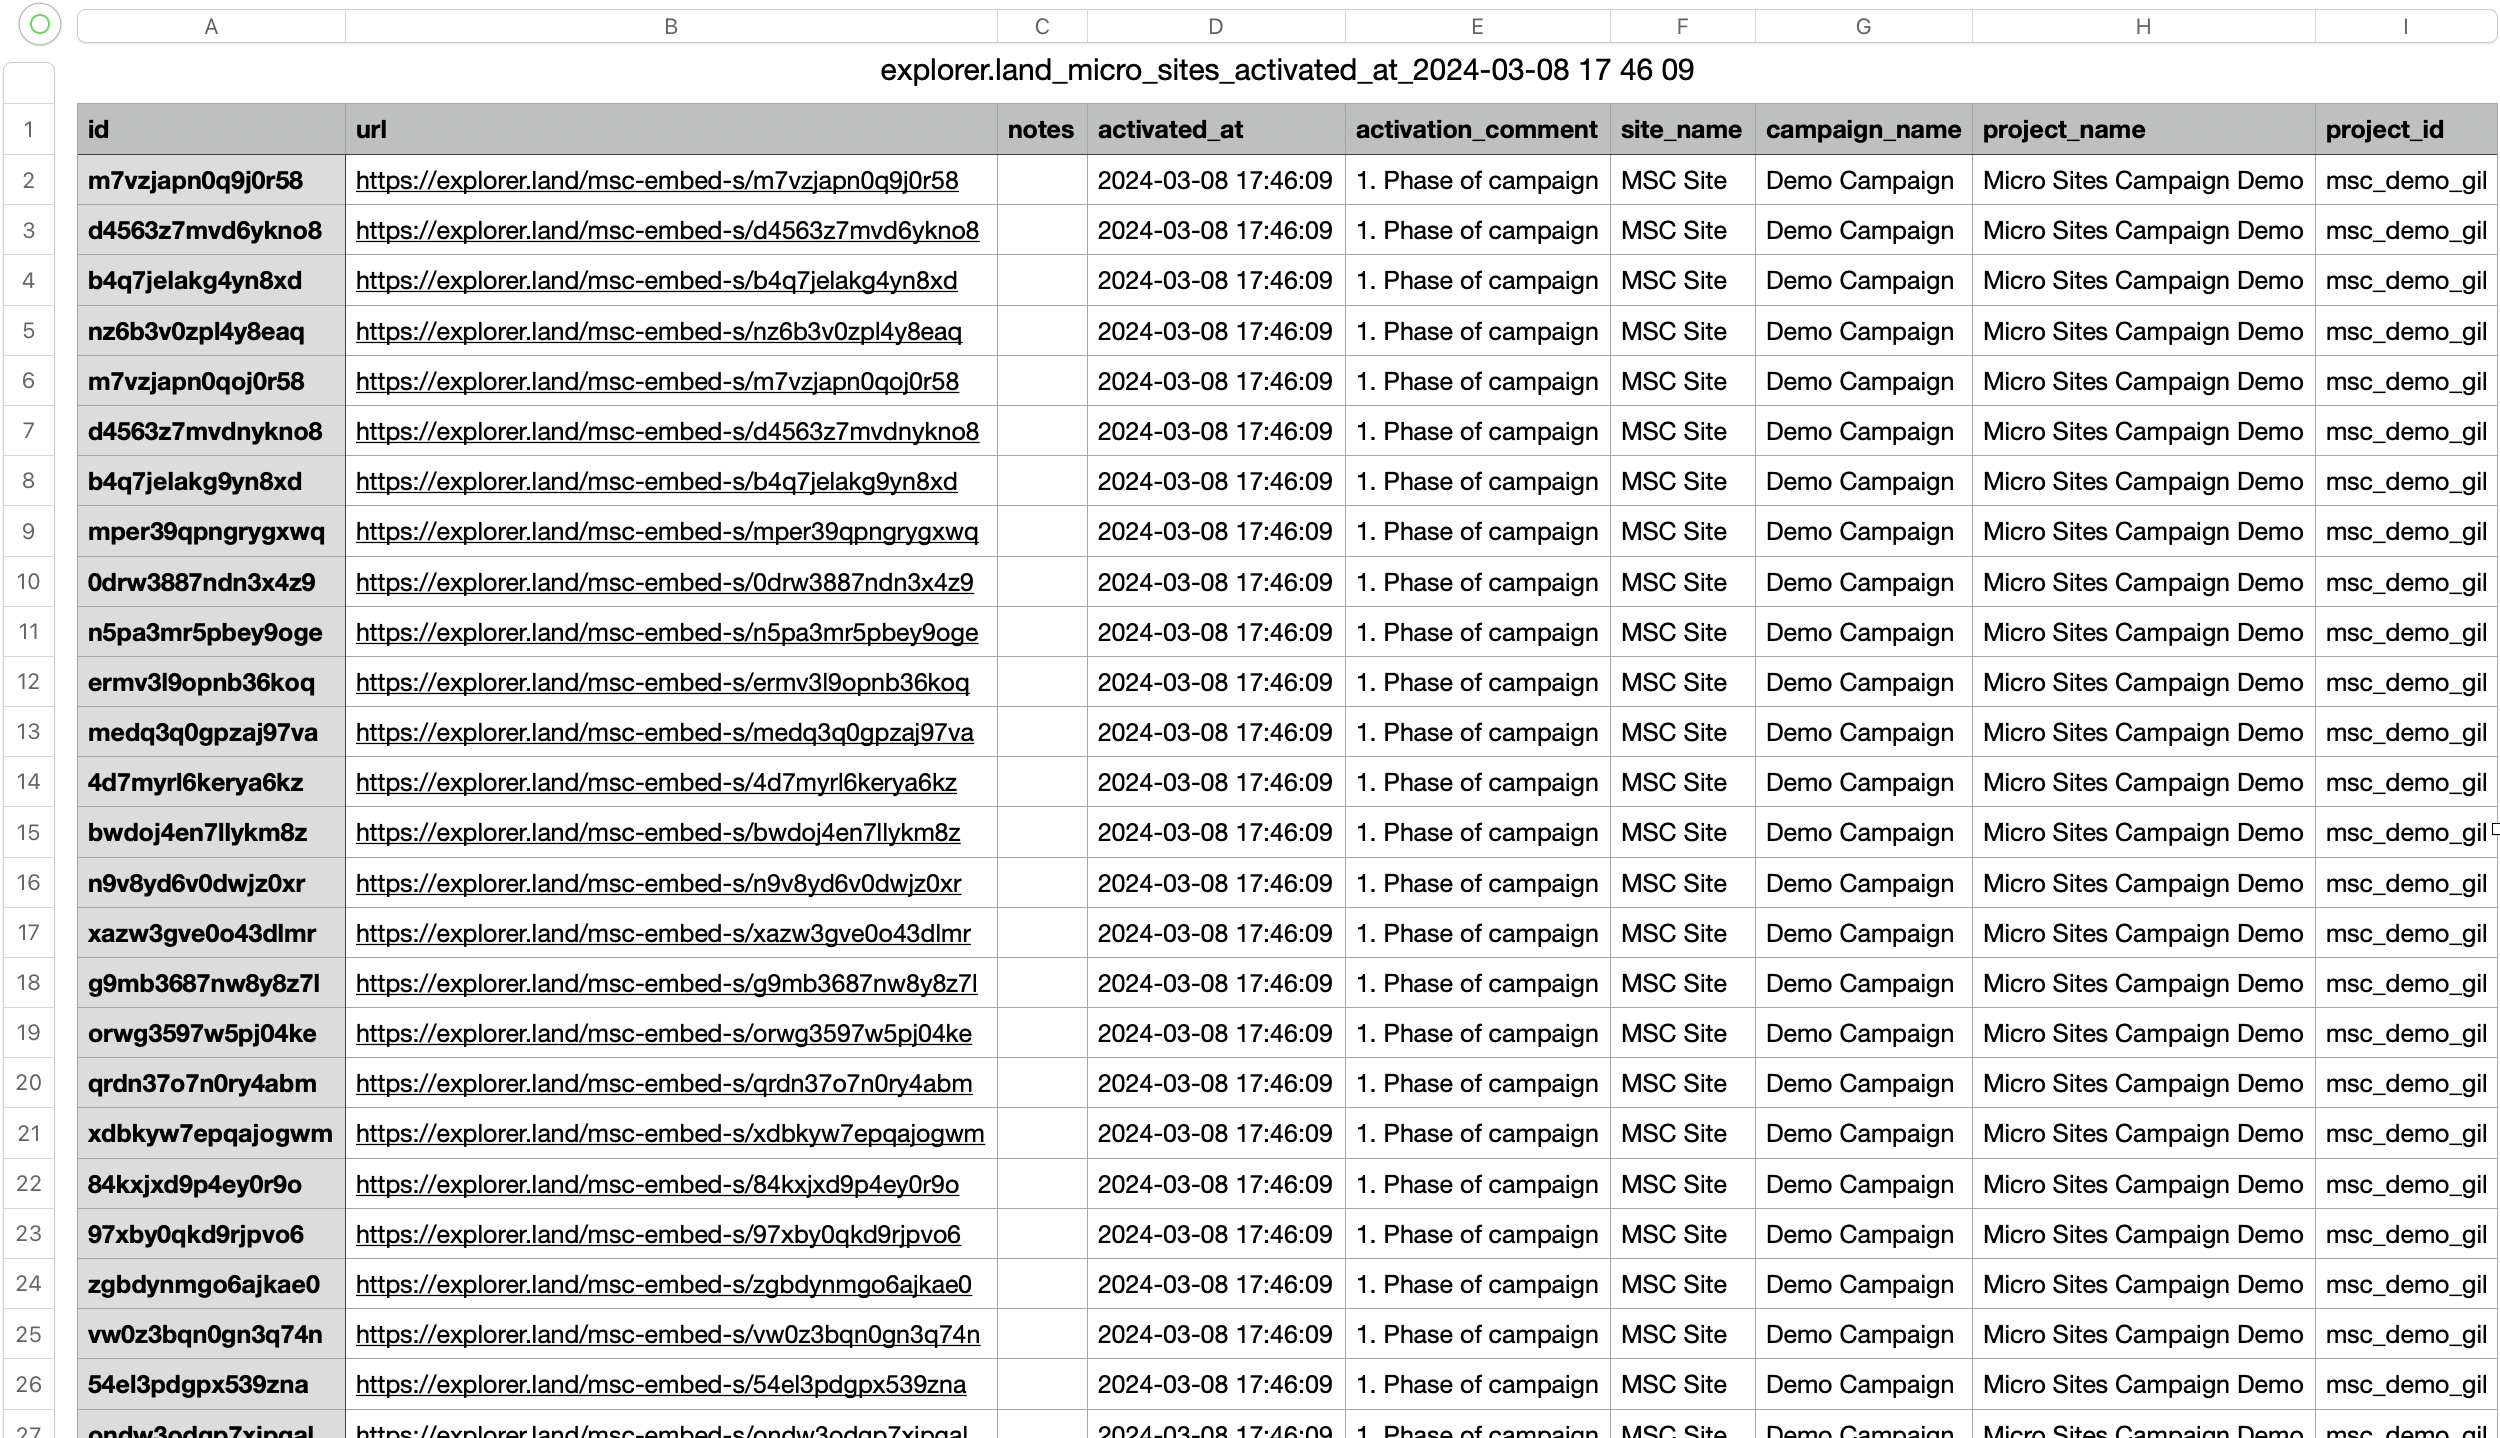
In the next step you can generate and download a CVS file with the Micro-Sites information. Click DOWNLOAD to download the file or CANCEL to skip this step (the Micro_Sites will still be activated).
The CSV file contains the following information:
MS id, MS url, notes, activation date/time, activation comment, site name, campaign name, project name and project id.
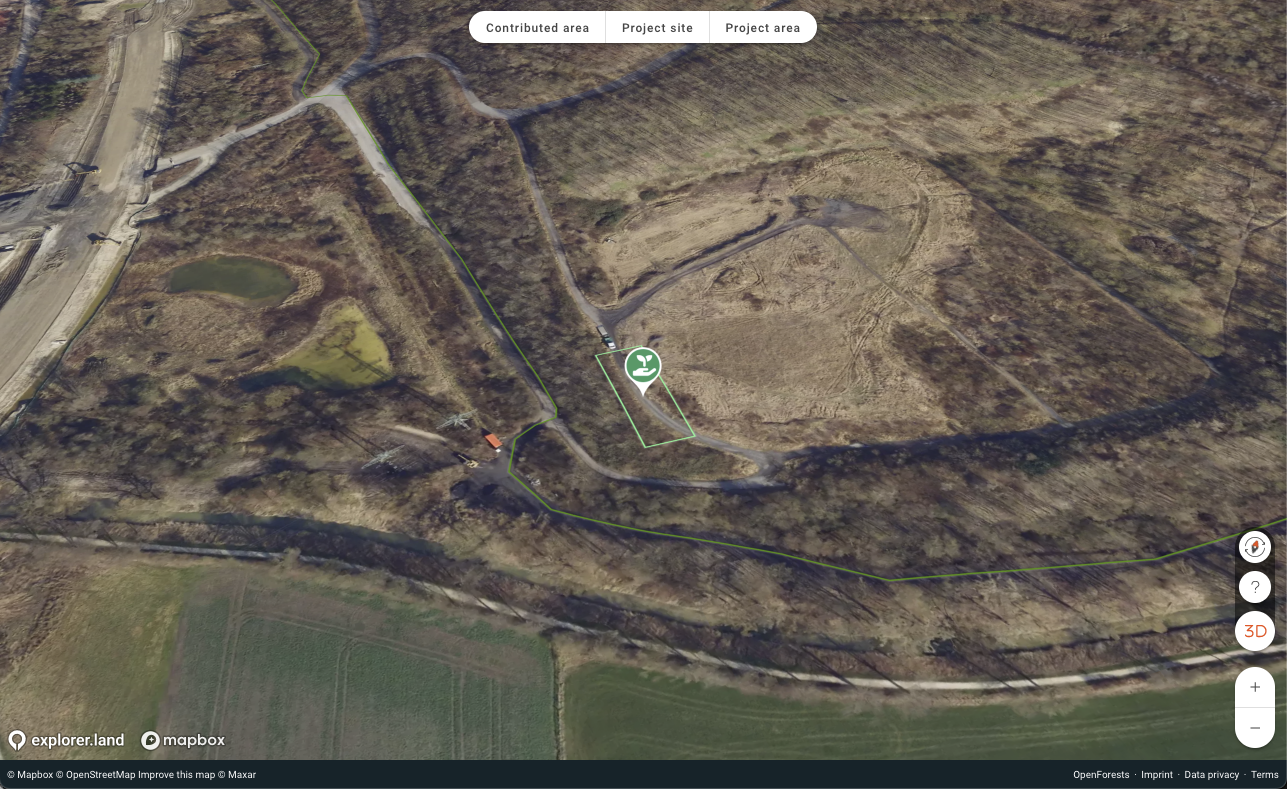
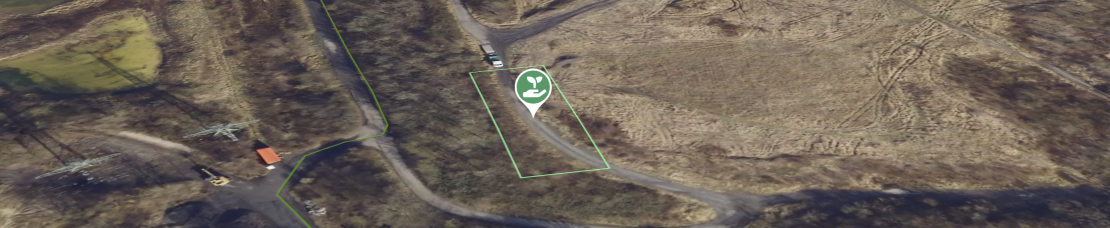
The Micro-Site map
The MS URL leads to the MS interactive map on explorer.land. This interactive map will show the location of the MS in the context of the Site and the broader Project. Navigating between these levels is possible using the navigation bar on the top of the map UI.