If you have an account on explorer.land and are a member of one or more projects, you will be able to use the Story Mapping App to feed your project with news posts.
Logging in
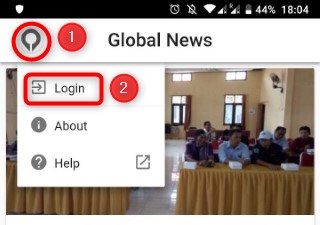
In order to create and upload posts to one of your projects on explorer.land, you need first to log in and connect to the platform. For that, click in the explorer.land logo on the top left and in the drop down menu select Login.
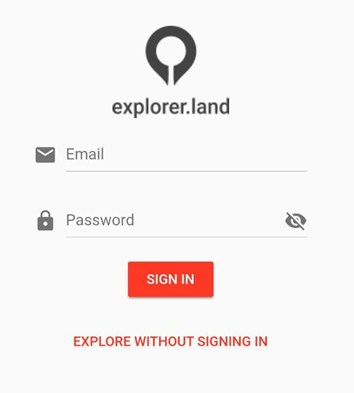
Login with the same credentials you use to access your account on explorer.land.
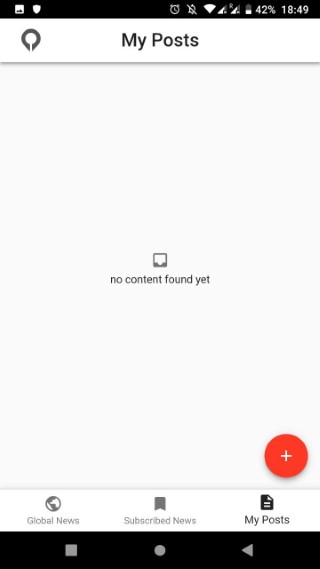
As soon as you are logged in and connected to your account, two new features become available.
- An orange PLUS button, which appears in the bottom right corner of your screen, will allow you to create new posts, and
- an additional My Posts section will list all posts you have created.
Creating a post
To create a post, click on the PLUS button. A form will open.

Following fields are available:
1. Project
Select the project where the post shall be published. In case you have access to more than one project, make sure you have selected the correct one!
2. Header Image
Select a photo to serve as header image for your post by clicking on the plus icon.
3. Gallery Images
Select images for your post gallery by clicking on the plus icon. You will be able to select an image form your mobile phone or shoot a new photo. Please note that you have to repeat this action for each image.
Note: Currently, the maximum number of images allowed for the gallery via the app is 15.
4. Title
Give your post a title.
5. Summary
Write a summary about what the post is about. Alternatively, you might want use this field to write down some notes for a posterior elaboration of the post.
6. Date
Select the date related to the content of the post. As default, the current date will be taken.
7. Coordinates
Record the coordinates of your current position by clicking on the REFRESH button.
Note: The GPS of your device must be on and initialized for this to work!
8. Post text (SHOW MORE)
By clicking on SHOW MORE, you will expand the Post text field where you can write the main post text.
Note: This field allows markdown formatting.
Some fields are mandatory. Only when these are filled out, you will be able to save the post.
Store your post locally by clicking the SAVE LOCALLY button.
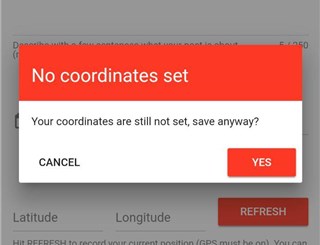
If no coordinates were set, a popup window inform you about it. You can decide if you want to proceed saving the post or cancel the operation and set the coordinates.
Note: All fields can be edited at a later point in time, including on the project dashboard on explorer.land, after uploading the post.
The "My Posts" list
As soon as one or more posts were created, you will find them in the My Posts section.
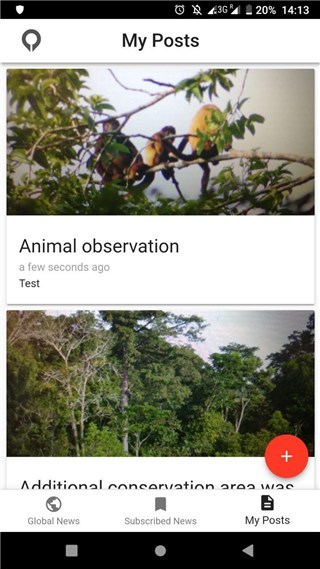
In order to delete, edit or upload a post, click on the respective card in the list to open the full post view.
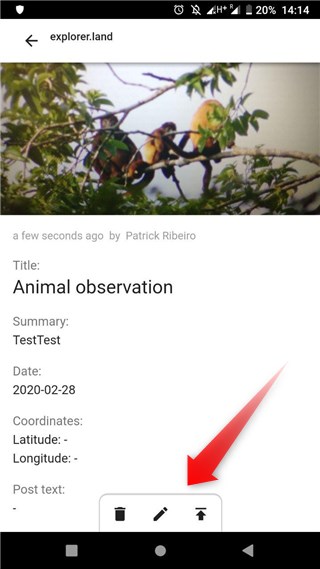
Editing a post
To edit a post, click on the center pen icon available at the bottom of the screen.

The edit form will open. Proceed as during the creation of the post.
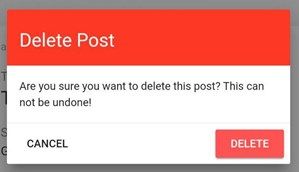
Deleting a post
To delete a post, click on the left garbage icon at the bottom of the screen.

Confirm in the popup window the deletion by clicking on the DELETE button.
Uploading a post
To upload a post, click on the upload icon at the bottom of the screen.

Notice that if your mobile device is not connected to the Internet (a respective message appears at the top of your screen) the upload operation will not be possible, the upload icon is grayed out.
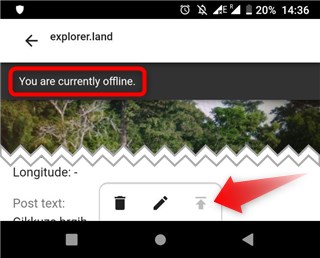
As soon as your post hast successfully been uploaded to explorer.land, a confirmation message will appear at the top of your screen.
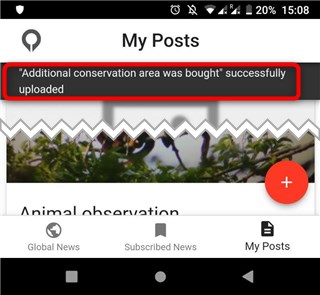
Note: As soon as a post has been uploaded to explorer.land, it will no longer be locally available on your mobile device. Log in to your account
The post on explorer.land
After uploading a post from the Story Mapping App to the explorer.land platform, you will find it in the post list of the project you have attached it to.
All post uploaded from the app will be draft, allowing additional editing before publication. You can edit all post fields, update the image gallery, set or change the coordinates, etc.
